Stripe integration
Connecting Stripe lets a client pay an invoice by card from the email you send them, instead of you chasing a transfer. The invoice carries a Pay with Stripe button; the client clicks it, pays on Stripe’s own page, and the payment comes back against the invoice.
Where to find it
Section titled “Where to find it”Settings → Integrations, fourth card.
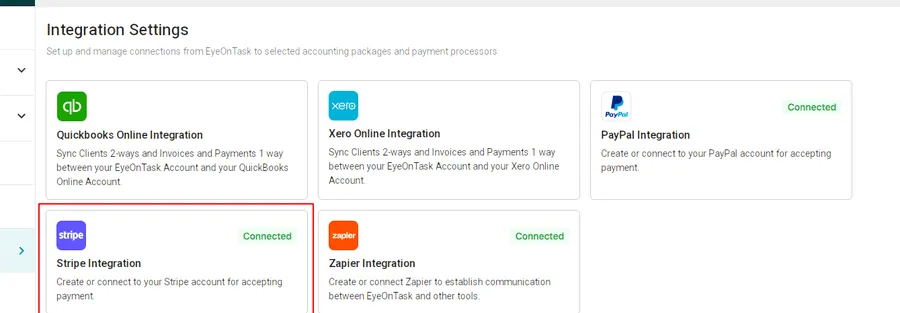
Settings → Integrations
Step 1 — start the setup
Section titled “Step 1 — start the setup”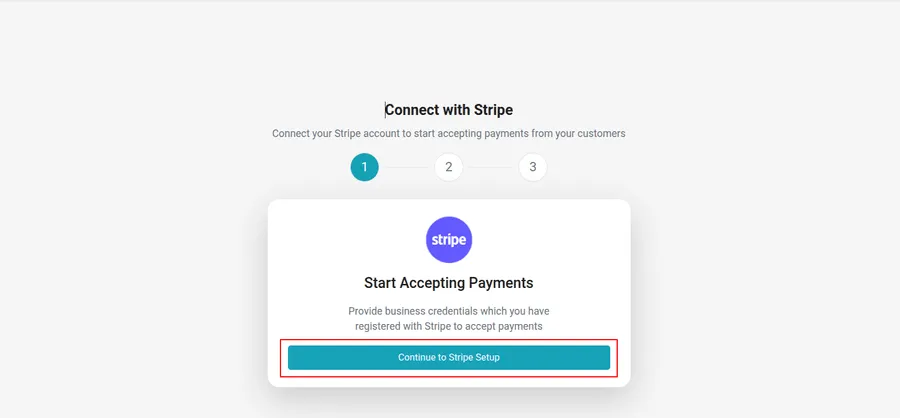
Settings → Integrations → Stripe
The connection runs as three numbered steps. Continue to Stripe Setup begins it.
Step 2 — the API keys
Section titled “Step 2 — the API keys”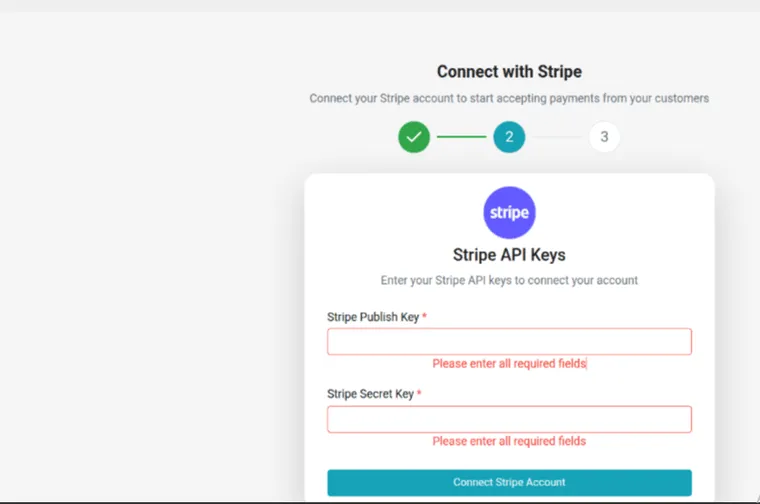
Stripe → step 2
Stripe identifies your account with a pair of keys, and EyeOnTask needs both:
- The publishable key (
pk_…) is the public half. It is safe to appear in a payment page. - The secret key (
sk_…) is the private half. It can move money on your account.
Both come from Stripe, not from EyeOnTask.
Getting them from Stripe
Section titled “Getting them from Stripe”In the Stripe dashboard, Developers sits at the bottom of the left-hand rail. Open it and choose API keys.
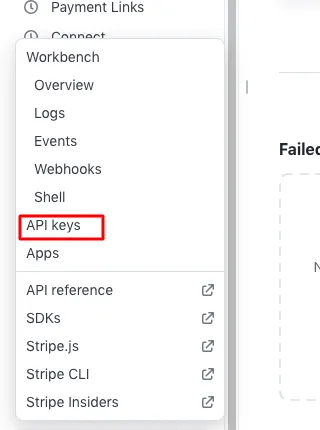
Stripe → Developers
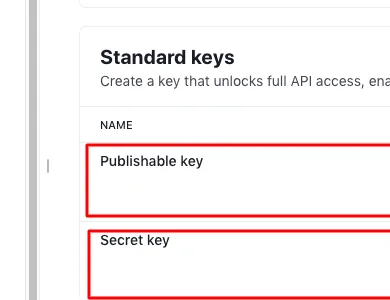
Stripe → Developers → API keys
Standard keys lists both. Copy each one into the matching field in EyeOnTask, then press Connect Stripe Account.
Step 3 — the processing fee
Section titled “Step 3 — the processing fee”Stripe takes a cut of every payment. The third step decides who carries it.
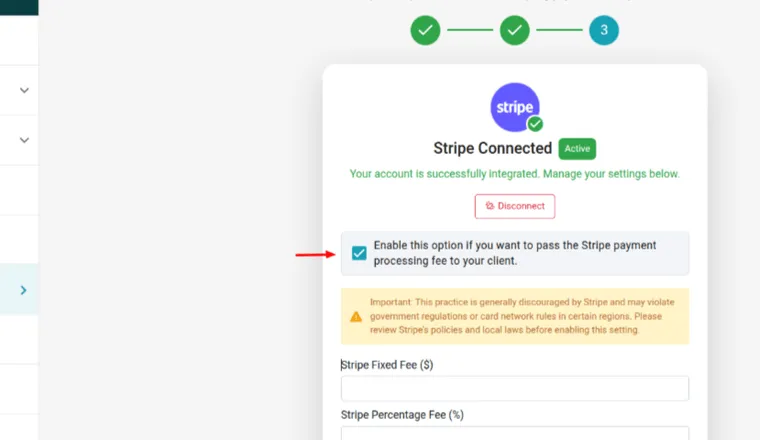
Stripe → step 3
Leaving the box unticked means you absorb the fee, which is what most businesses do. Ticking it adds the fee to what the client pays.
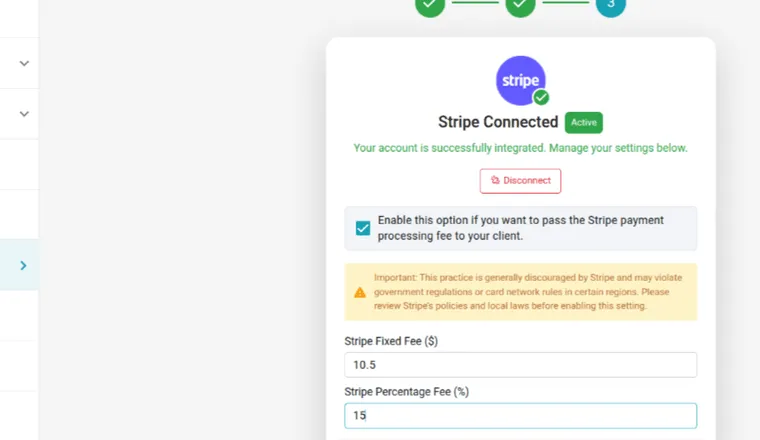
Stripe → step 3, with the fee set
If you do turn it on, set both parts of the fee — Stripe Fixed Fee ($) for the flat amount and Stripe Percentage Fee (%) for the proportion — to match what Stripe actually charges you. Save Changes commits it.
Once connected, the card shows Stripe Connected with an Active badge, and a Disconnect button if you need to unhook it later.
Putting the button in the invoice email
Section titled “Putting the button in the invoice email”Connecting Stripe does not by itself put anything in front of the client. The Pay with Stripe button is a token you add to the invoice email template, so you decide which emails carry it.
Go to Settings → Templates → Email Template, then under Send mail to Client open Invoice and edit either Invoice Email Template With job or Invoice Email Template Without job.
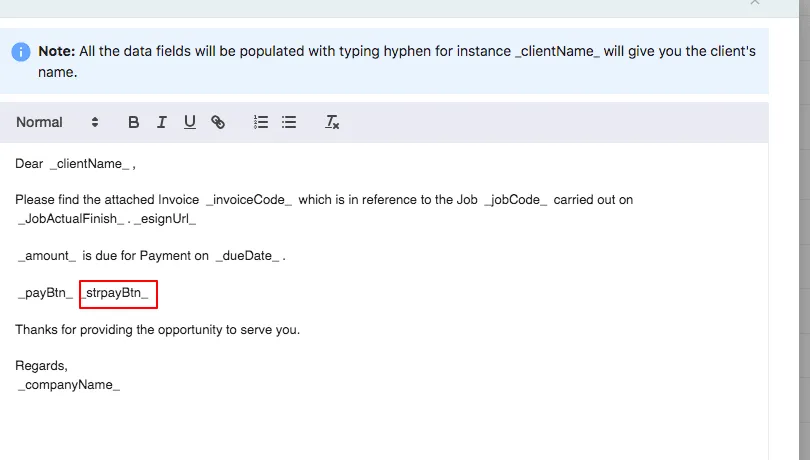
Settings → Templates → Email Template → Invoice
In the body, type _strpayBtn_ where the button should appear. Typing an underscore opens the list of available tokens, so you can pick it rather than typing it out. Save at the foot of the editor.
What the client sees
Section titled “What the client sees”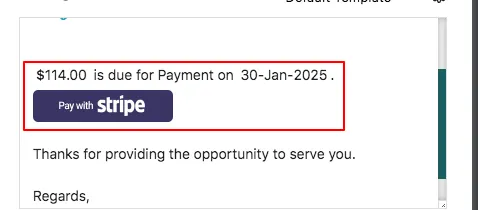
Preview and Send Invoice → message
The button now renders in the invoice email. Clicking it takes the client to Stripe’s own payment page, where they enter their card details — those never pass through EyeOnTask.
Where to go next
Section titled “Where to go next”- PayPal integration — the other way of taking payment from an invoice
- Sending an invoice — the Preview and Send dialog the button appears in
- Email, SMS and WhatsApp templates — the rest of the template tokens
- Invoice payments — where a card payment lands once it clears