Zapier integration
Zapier connects EyeOnTask to a few thousand other apps without anybody writing code. You pick something that happens here — a job finishing — and something that should happen there, and Zapier does it every time from then on.
EyeOnTask offers two triggers: Job Completed and Job Created. Everything you build starts from one of them.
Those two are the whole list, which decides what a Zap can be trusted with. A job being rescheduled, reassigned or cancelled fires nothing, so anything a Zap creates elsewhere — a calendar event, a spreadsheet row, a card on a board — is right at the moment the job was created and is not corrected afterwards. Good for tell me when new work arrives; not a way to mirror the scheduler somewhere else.
Where to find it
Section titled “Where to find it”Settings → Integrations, fifth card.
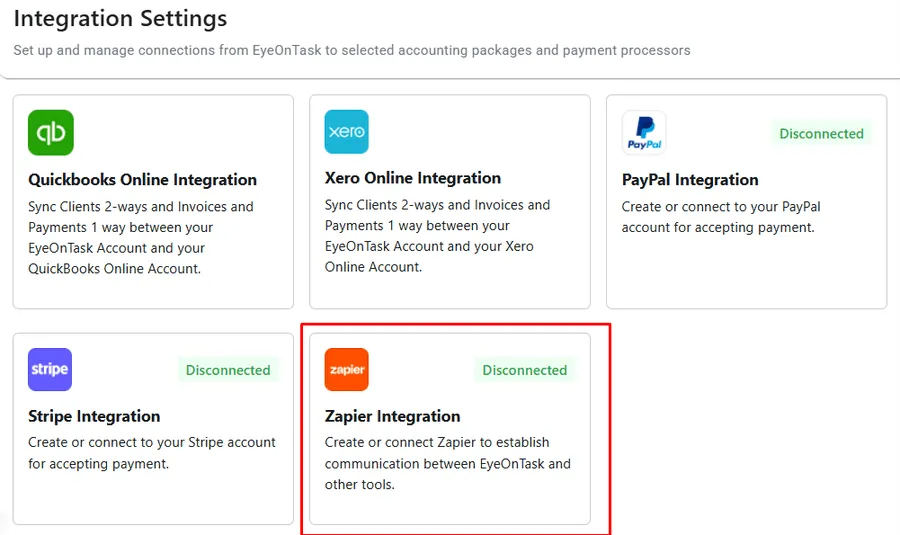
Settings → Integrations
The API key
Section titled “The API key”Zapier proves it is really your account with a key that EyeOnTask generates.
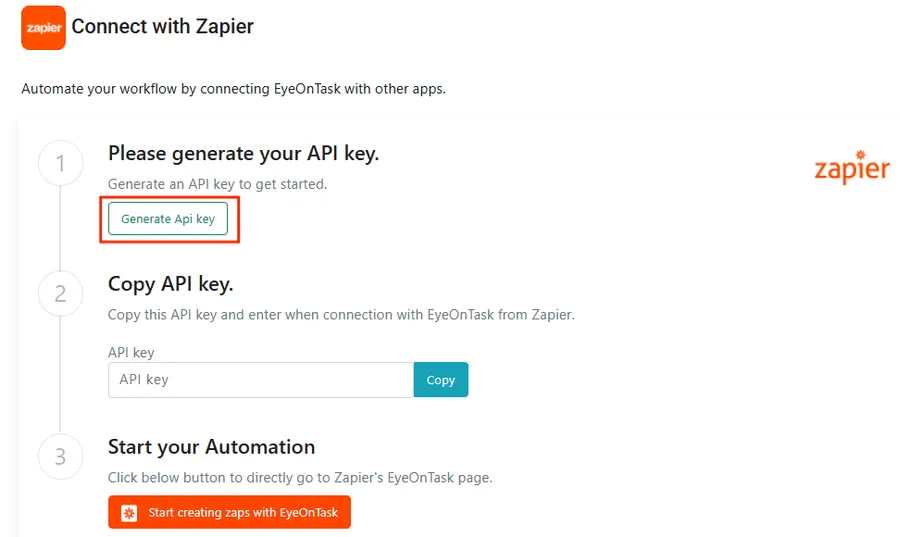
Settings → Integrations → Zapier
- Generate Api key creates one.
- Copy puts it on the clipboard. You will paste it into Zapier in a minute.
- Start creating zaps with EyeOnTask hands you over to Zapier, signing in on the way.
Building the first Zap
Section titled “Building the first Zap”The rest happens in Zapier. A Zap is one trigger and one or more actions.
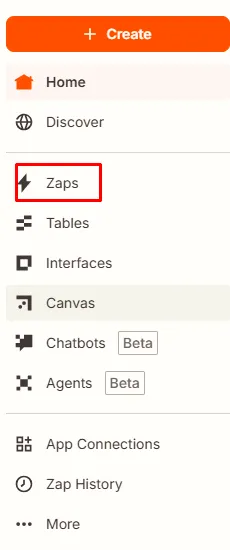
Zapier → Create → Zaps
The trigger
Section titled “The trigger”Choose Trigger, then search for and pick EyeOnTask.
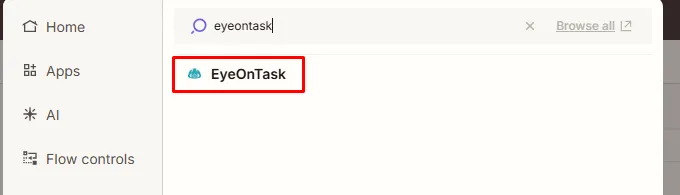
Zapier → Trigger → search
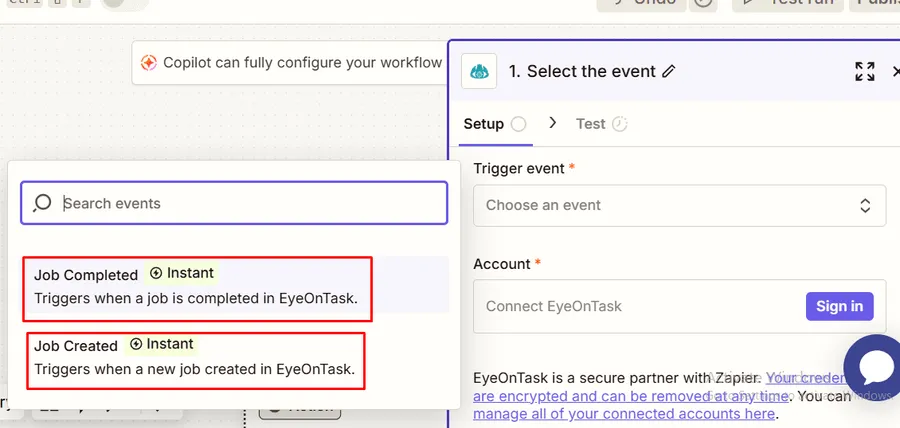
Zapier → Select the event
Pick the Trigger event:
| Event | Fires when |
|---|---|
| Job Completed | A job is marked complete in EyeOnTask |
| Job Created | A new job is raised in EyeOnTask |
Both are instant — Zapier is told as it happens rather than polling for changes.
Connecting the account
Section titled “Connecting the account”On the Account tab, Zapier asks for the key.
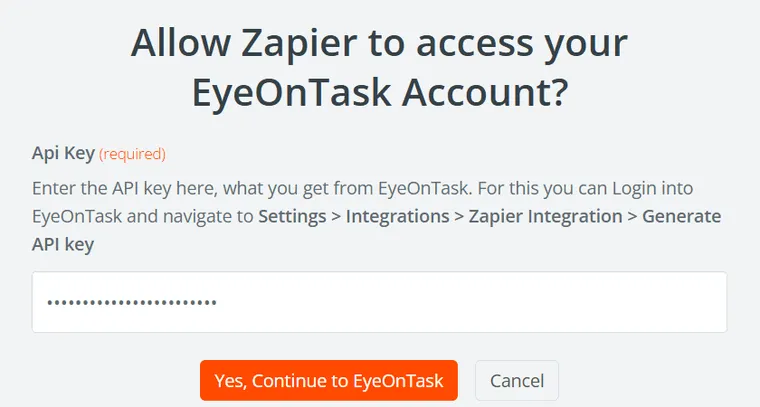
Zapier → Account → Allow Zapier to access your EyeOnTask Account
Paste the key you copied and press Yes, Continue to EyeOnTask. The two are now linked; Continue moves on.
The action
Section titled “The action”Action is what should happen when the trigger fires. Any app Zapier supports will do — this walkthrough uses Google Sheets with the Create Spreadsheet Row action event, so every completed job writes a line into a sheet.
Link the Google account that owns the sheet, then choose the Drive, Spreadsheet and Worksheet to write into.
Mapping the fields
Section titled “Mapping the fields”This is the step that actually matters, and the one people rush.
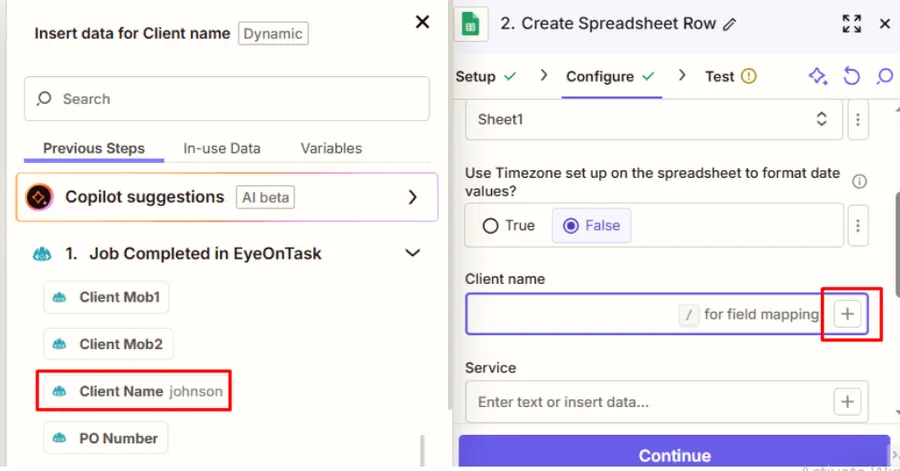
Zapier → Configure → field mapping
Zapier lists the columns of your sheet down one side and the fields from Job Completed in EyeOnTask down the other. The + beside a column opens the EyeOnTask fields; pick the one that belongs there. Work through every column you care about, then Continue.
Map nothing and the Zap will run happily and write empty rows.
Test and publish
Section titled “Test and publish”Test step runs it once for real, so you can go and look at the sheet.
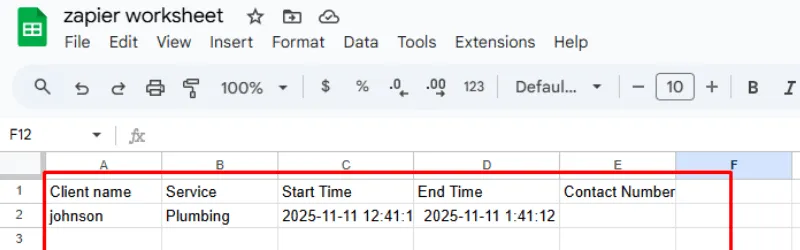
Google Sheets → the row the test wrote
If the row looks right, Publish.
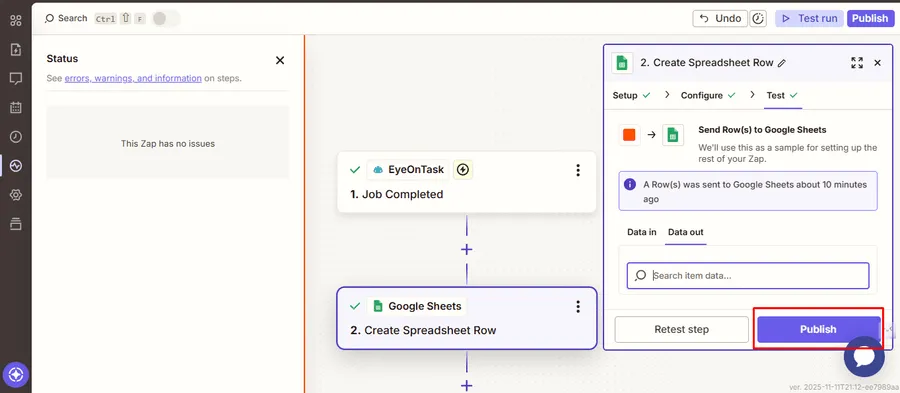
Zapier → Publish
Until you publish, the Zap is a draft and nothing happens automatically. After it, every completed job runs it.
What this is good for
Section titled “What this is good for”The Google Sheets example is the simplest one, but the same two triggers drive anything: post finished jobs into a Slack channel, add the client to a mailing list when a job is created, raise a row in a reporting sheet your accountant reads, or start a follow-up sequence a week after completion.
Where to go next
Section titled “Where to go next”- How jobs work — what “completed” actually means on a job
- Job statuses — the status that fires the Job Completed trigger
- QuickBooks integration and Xero integration — purpose-built accounting links, rather than a Zap