Tracking workers and jobs on the Map
Map puts your whole field operation on one screen — every team member and every job for the selected day, in the same view. From here you can see who is where, spot a worker whose phone has stopped reporting, and assign nearby work without opening the scheduler.
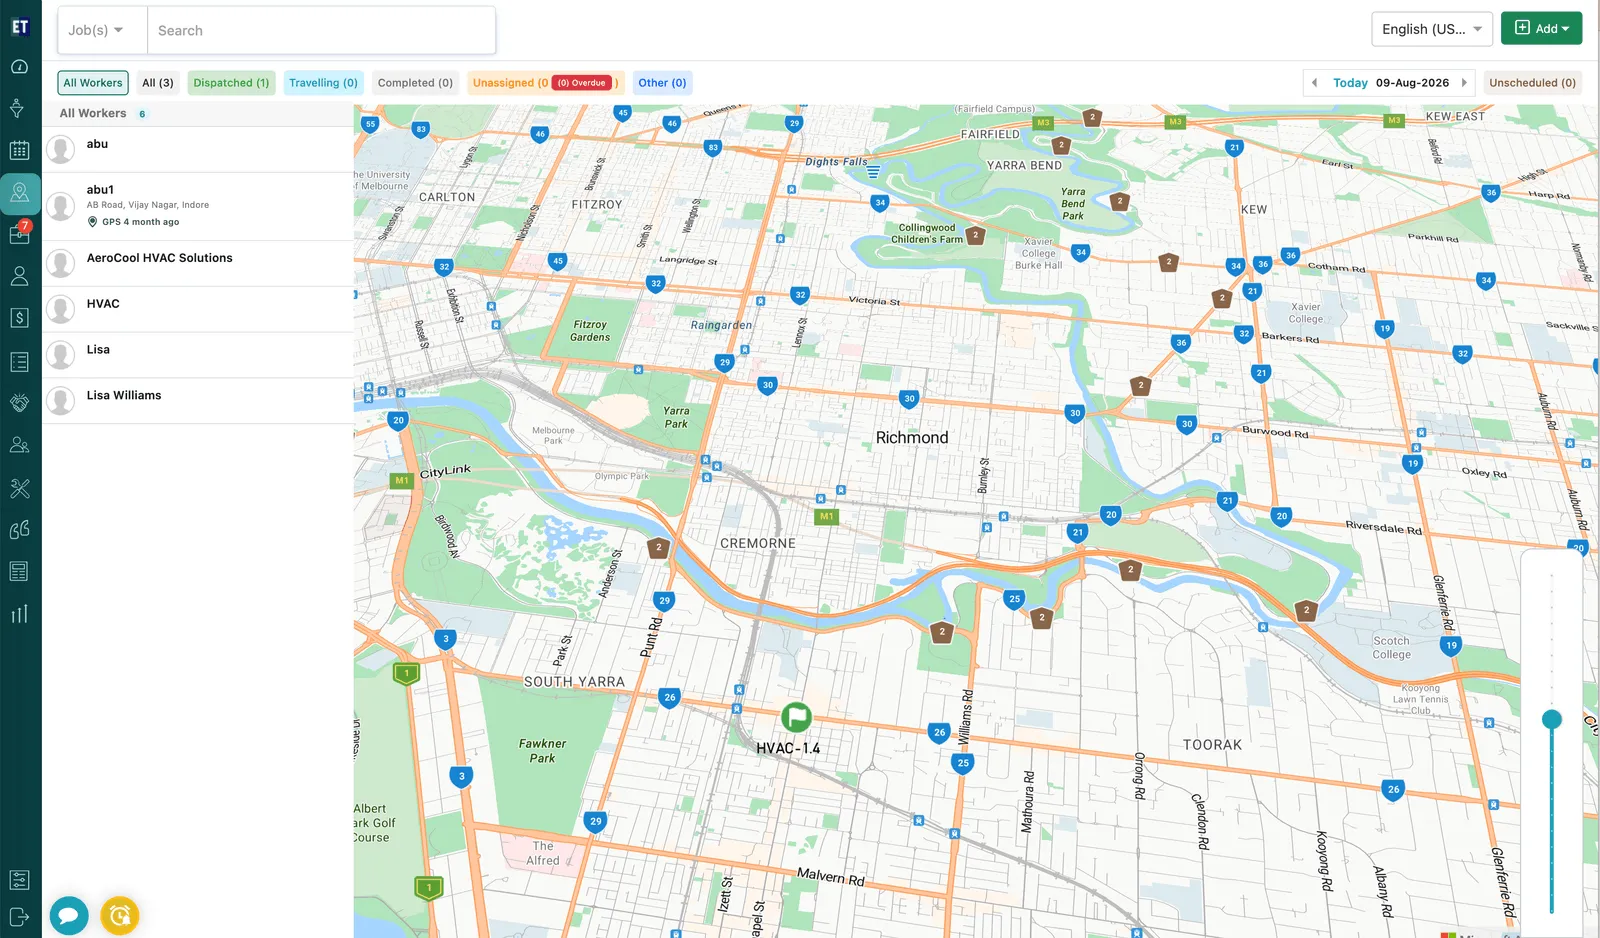
Map → All Workers, full view
The layout stays the same throughout: filters across the top, a list panel down the left, and the map filling everything else. The close-ups later in this page are all details from these two panes.
Choosing what the map shows
Section titled “Choosing what the map shows”The bar across the top switches the map between a worker view and a job view, and filters the jobs by status.

Map → filter bar
- All Workers — the worker view: your team, plus their last reported positions.
- All and the status filters (Dispatched, Travelling, Completed, Unassigned, Other) — the job view. Each filter shows its own count, and Unassigned carries an overdue badge so work that has slipped is visible immediately.
On the right are the day controls:

Map → day controls
The arrows move the map between days, and Unscheduled collects work that has no date on it at all.
Workers
Section titled “Workers”The worker list
Section titled “The worker list”All Workers lists everyone on your team with their address and, importantly, when their device last reported a position.
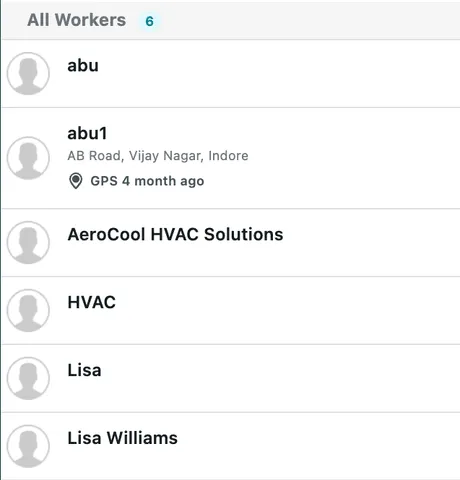
Map → All Workers list
A line like GPS 4 month ago is the quickest signal that someone’s tracking has stopped — you can see it without opening the worker.
A worker on the map
Section titled “A worker on the map”Each worker appears as a marker at their last known position. Clicking the marker opens a summary — battery level, when they were last active, and their mobile number — and draws a circle showing the search radius around them.
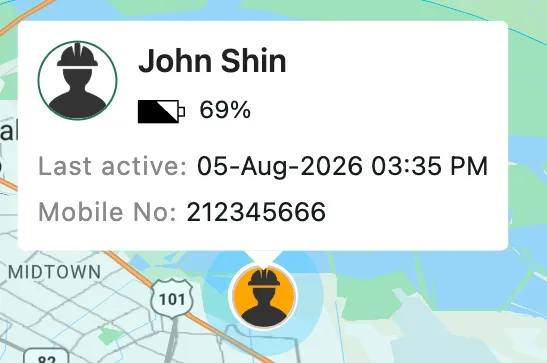
Map → worker marker on the map
Battery level is worth paying attention to. A phone low on battery stops reporting long before anyone thinks to mention it, so a dropping percentage often explains a worker who has quietly disappeared from the map.
Opening a worker
Section titled “Opening a worker”Selecting a worker turns the left panel into everything about that person, and centres the map on them:
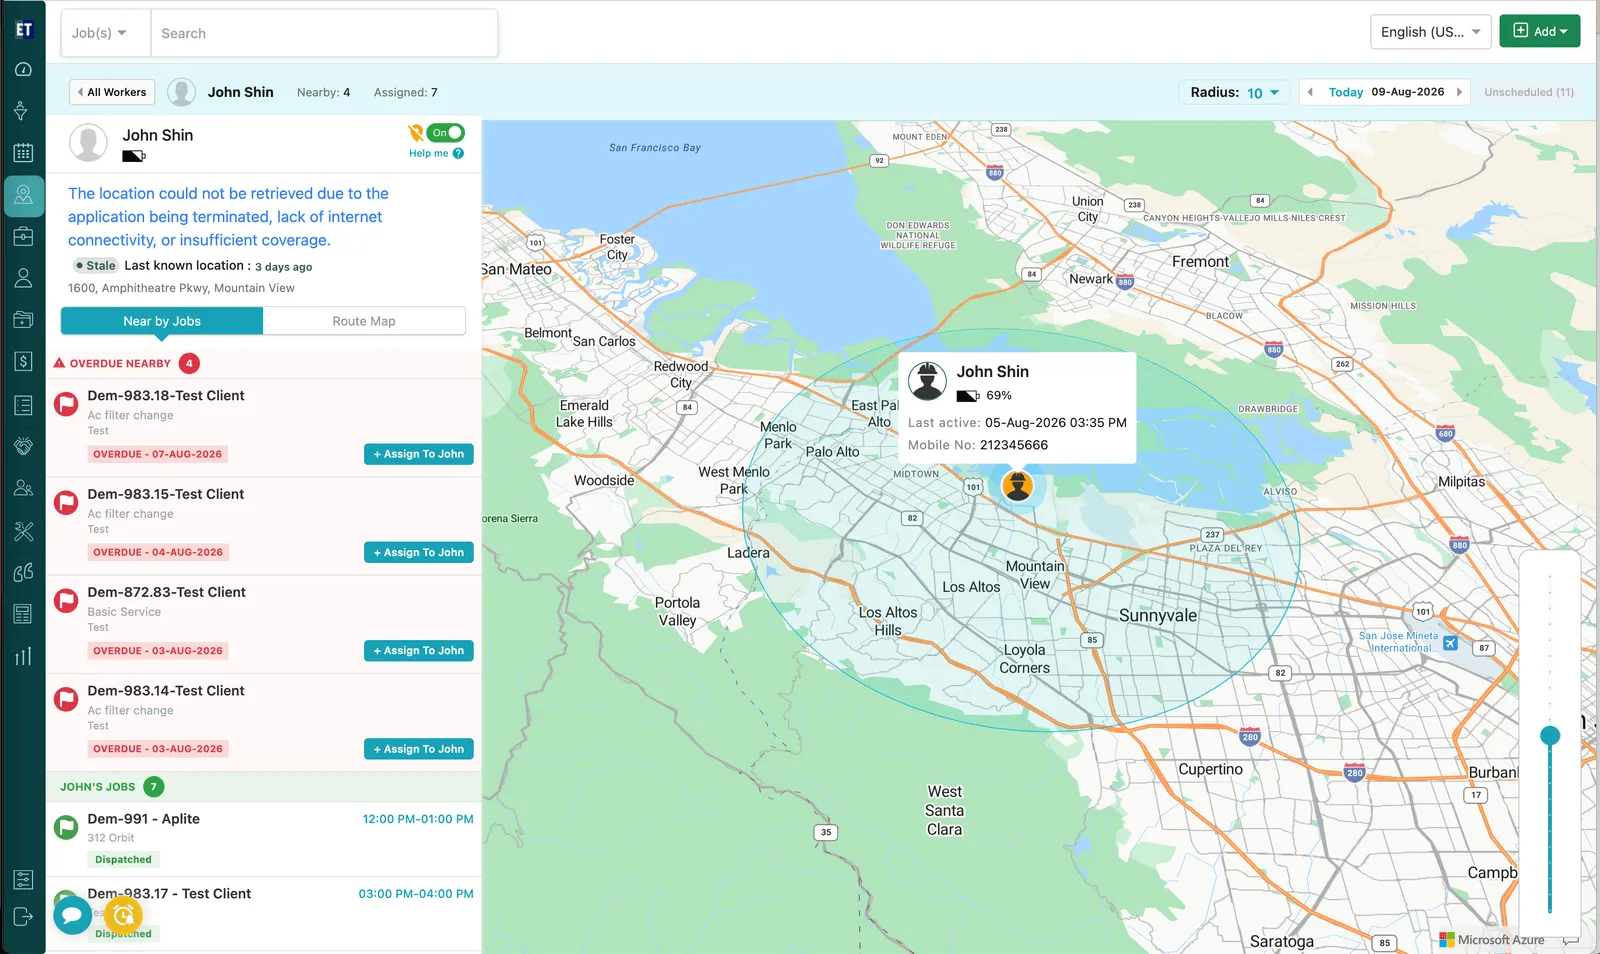
Map → a worker selected, full view
That single screen is where most of this page’s close-ups come from — the status panel at the top, the job lists below it, and the marker on the map. Taking it a piece at a time:

Map → selected worker, header bar
Nearby is how many jobs fall inside the current radius; Assigned is how many are already theirs. ‹ All Workers takes you back to the full team.
When a location can’t be captured
Section titled “When a location can’t be captured”This is the part of the Map that saves the most time. If a worker’s position is missing, the panel tells you why rather than just showing nothing.
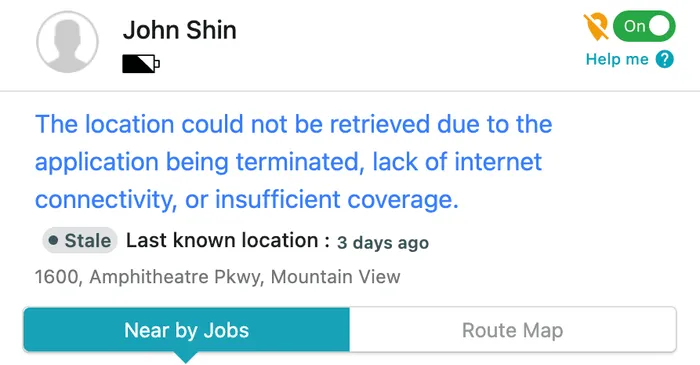
Map → selected worker, status panel
The message names the cause, and there are three you’ll see regularly:
- The user is logged out of the mobile application — nothing can be reported until they sign back in.
- GPS is turned off — the app is signed in, but location is disabled on the device, so the field user needs to turn the GPS service back on.
- The application was terminated, or there’s no internet / insufficient coverage — the app isn’t running or can’t reach the network. This one often resolves itself once they’re back in coverage.
- It is outside tracking hours — location is only recorded between the Start Time and Finish Time set in mobile app settings. Outside them the worker’s popup says location capturing is not allowed at this time, and nothing is being recorded to show.
- The phone put the app to sleep — Android closes apps it decides are idle, and every manufacturer adds its own power saving on top, under its own name. The fix is on the device: location set to Allow all the time, background battery use allowed, and the app excluded from whatever that phone calls sleeping apps or battery optimisation. See keeping location reporting working.
Whichever it is, the panel still gives you something to work with: a Stale badge, the last known location with its address, and how long ago it was recorded. A worker who is reporting normally is shown as live instead, so you can tell the two apart at a glance.
The panel also carries:
- Battery level — see above; frequently the real answer.
- An On / Off toggle — turn tracking off for a worker you don’t want to log locations for, and back on when you do.
- Help me — guidance for sorting out the permission or GPS problem on the device.
Nearby jobs, and assigning them
Section titled “Nearby jobs, and assigning them”With a worker selected, the Near by Jobs tab lists the work closest to them — and lets you hand it over on the spot.
Anything already past its date is grouped at the top under Overdue Nearby, with the date it slipped:
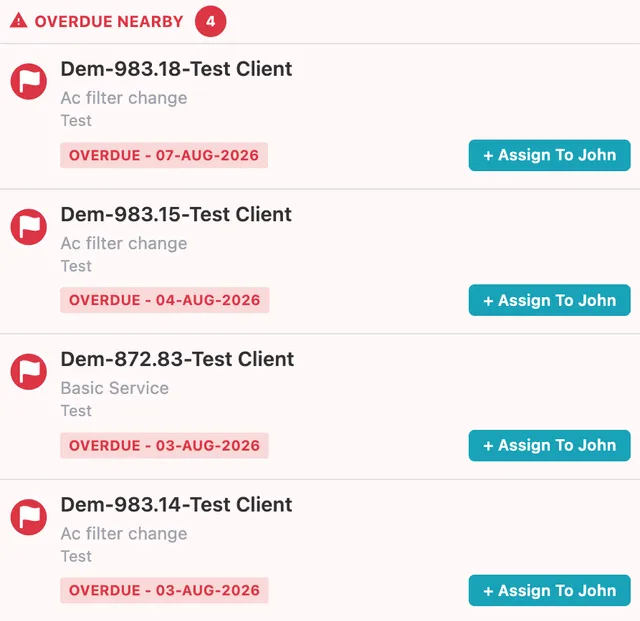
Map → selected worker → Near by Jobs tab
+ Assign To <name> assigns that job to the selected worker without leaving the Map — so when someone finishes early, or you spot overdue work sitting near where they already are, you can clear it in one click.
Below that, the same panel shows the jobs already assigned to them for the day, with their time slots and status:
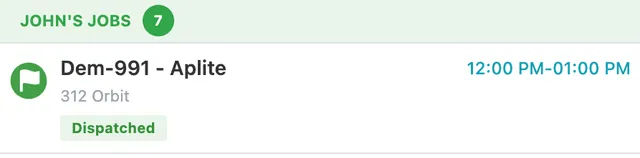
Map → selected worker → Near by Jobs tab
Together the two lists answer the question you actually have: what could this person pick up, and what are they already committed to?
How far “nearby” reaches is set by the Radius control in the day bar — widen it to pull in more jobs, or narrow it to keep suggestions genuinely close by.
Route Map
Section titled “Route Map”The second tab, Route Map, is the history view. It lists the days that have recorded movement for that worker, each with its own Route Map button:
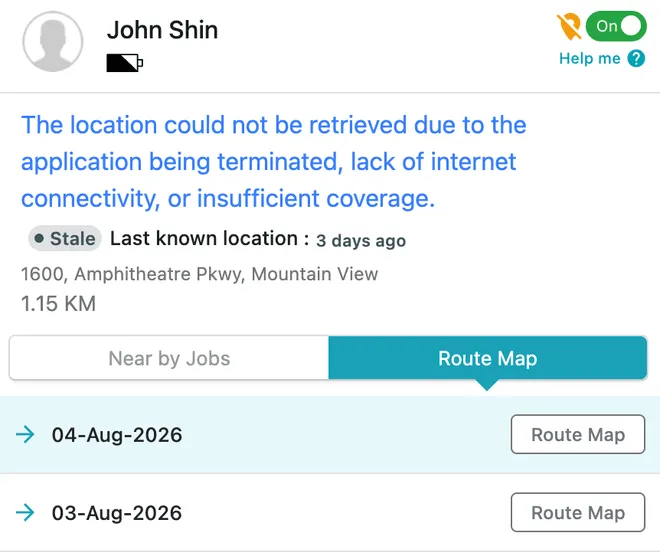
Map → selected worker → Route Map tab
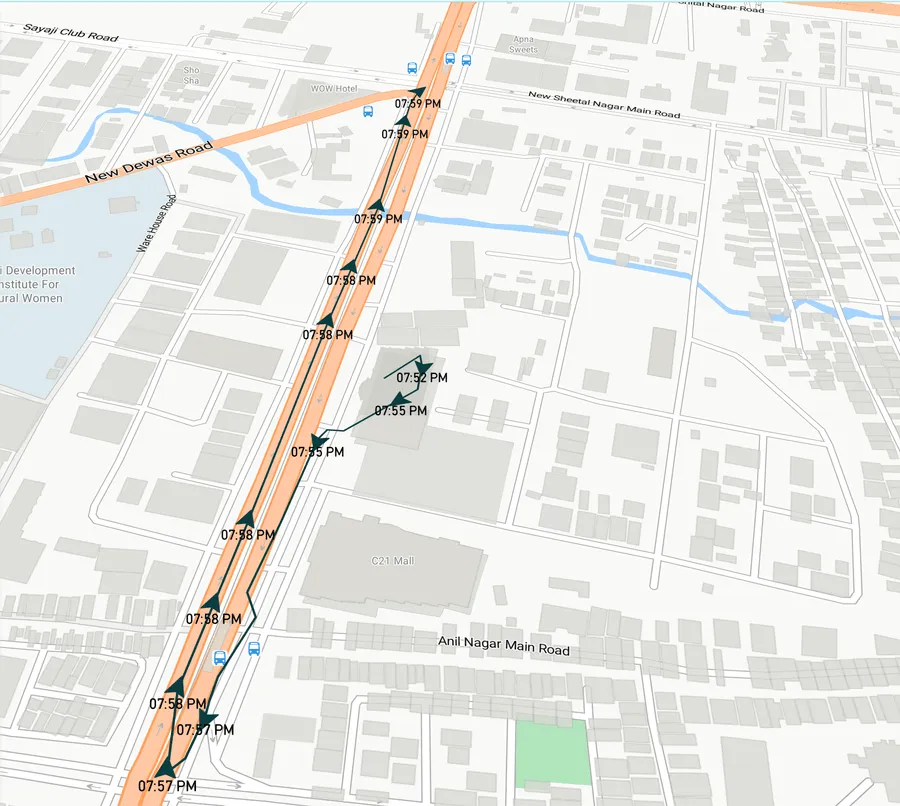
Opening a day draws that worker’s entire route for it, with arrows showing the direction of travel and every recorded point stamped with its time:
Map → Route Map, one day’s route
Because each point is timed, you can follow exactly where someone went and in what order — useful for confirming attendance at a site, checking travel between jobs, or answering a customer query about when a technician arrived.
Switching to a job filter keeps the same layout, but the left panel now lists work instead of people:
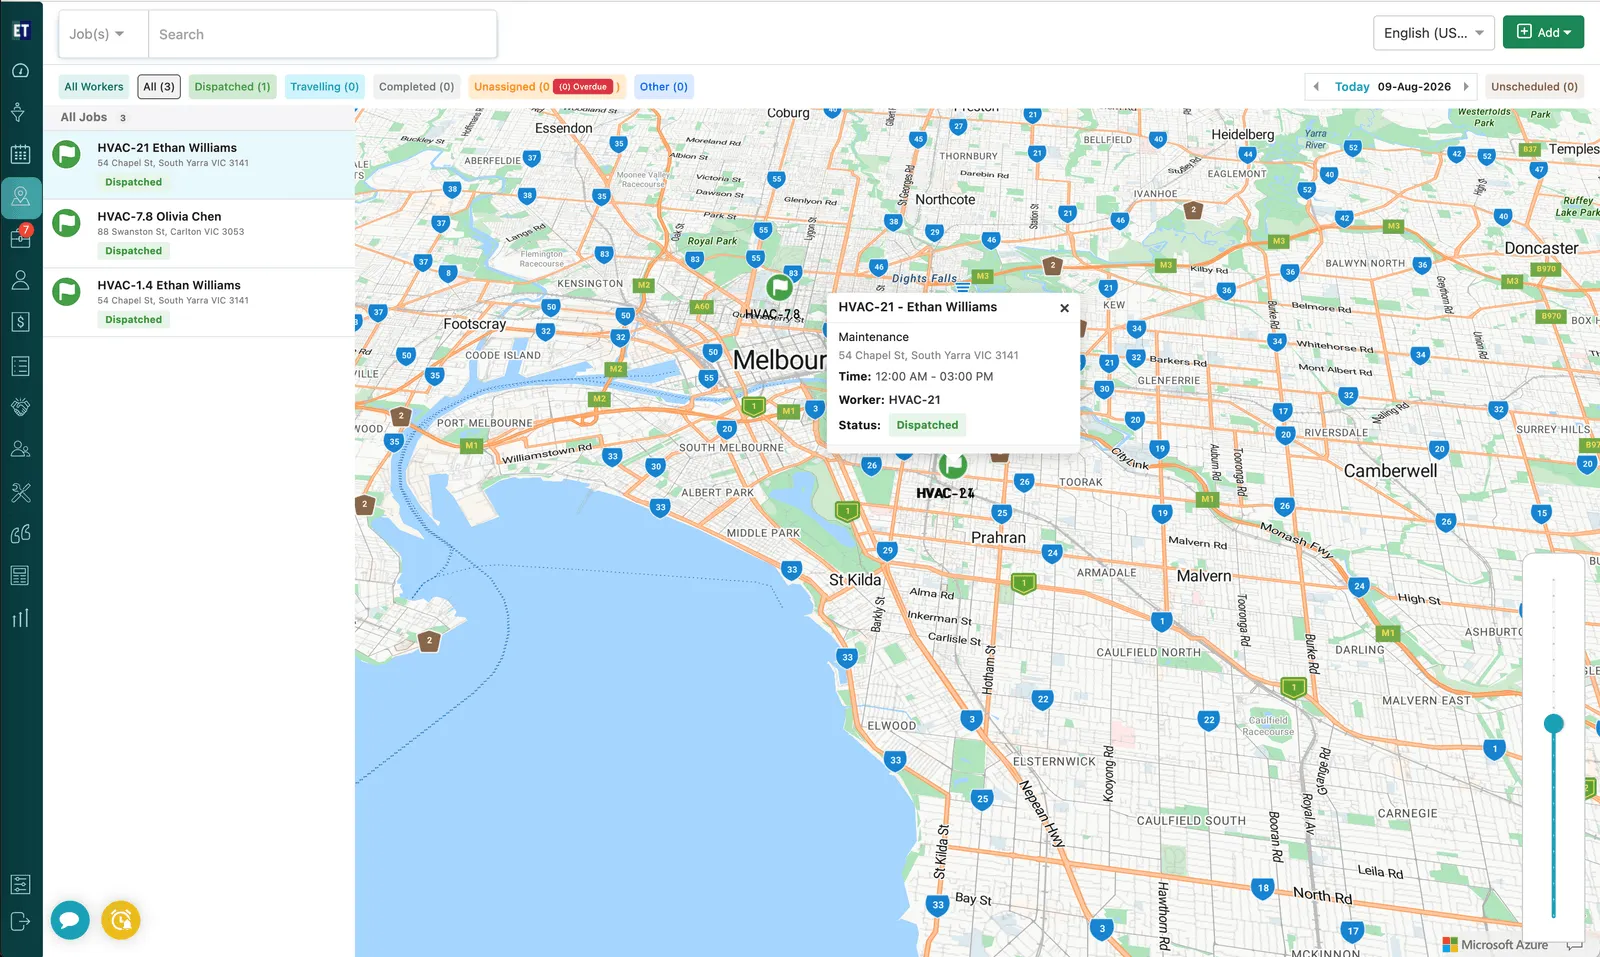
Map → job view, full view
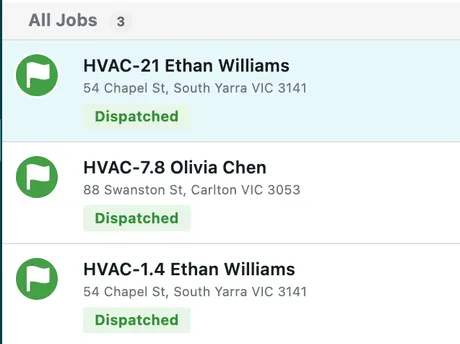
The job list
Section titled “The job list”The list shows the jobs for the selected day with their code, client, site address, and status.
Map → job list
Opening a job
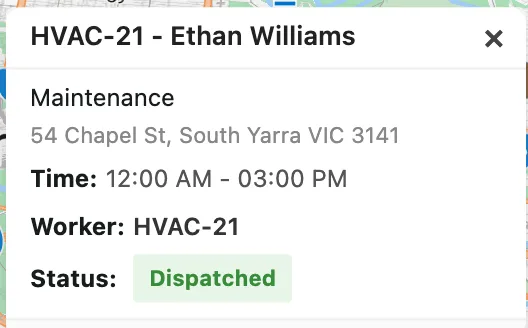
Section titled “Opening a job”Selecting a job centres the map on it and opens its details.
Map → job popup on the map
The popup shows the job type, site address, scheduled time window, the assigned worker, and the current status. Because the map is now centred on that job, the other work around it is visible too — so you can see what else is in the same area and assign it from there.
Filtering the list
Section titled “Filtering the list”Choosing a status filter narrows both the list and the map to just that work.
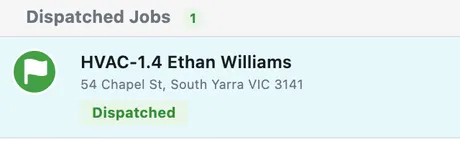
Map → job list with a status filter applied
Selecting any job in a filtered list behaves the same way — the map centres on it and shows what’s nearby.
Creating work from the map
Section titled “Creating work from the map”The Add button in the top-right creates a Job, Appointment, or Audit without leaving the Map, so you can act on a gap as soon as you spot one.