Finding equipment
Both equipment lists come in two shapes. Simple View is the reading view — units down the left, the selected one open beside them. Table View is the working view — every unit in a row, searchable, filterable and sortable.

Equipment → Client’s Equipment → Table View
The button is labelled with the view you are going to, so Table View takes you across and Simple View brings you back.
The table
Section titled “The table”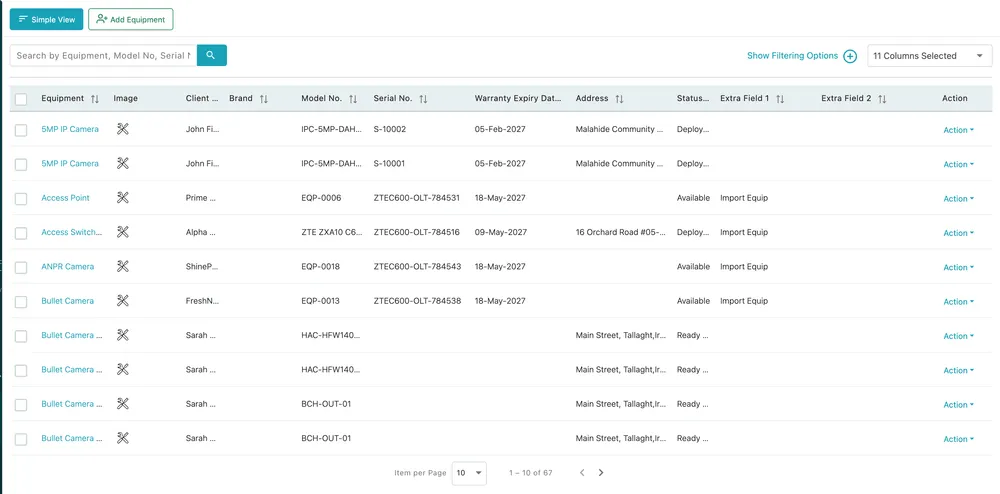
Equipment → Client’s Equipment → Table View
Each row is one unit. Equipment is a link to its page, and Action at the end opens what you can do with that row without opening it.
Searching and filtering
Section titled “Searching and filtering”
Equipment → Table View → toolbar
- The search box matches on equipment name, model number and serial number, which covers the three ways somebody describes a unit over the phone.
- Show Filtering Options opens the filters, for narrowing to a client, a status, a category and so on.
- 11 Columns Selected chooses which columns appear. Turn off what you never read and the table gets narrower.
- The ⇅ arrows in a heading sort by that column.

Equipment → Table View → Show Filtering Options
The filters narrow the table by Warranty Expiry Date, Status, Category, Equipment Group, Parts/Equipment, Client, Project/Site Name, Equipment Condition and your two extra fields. Apply Filters runs them; Clear Filters puts the whole list back.
Archived Equipment, the tickbox beside the extra fields, is the one that behaves differently. Archived units are left out of this list entirely, and ticking it is how you see them — see archived equipment.
What the columns tell you
Section titled “What the columns tell you”The default set covers identity, cover and whereabouts in one line:
| Column | What it answers |
|---|---|
| Equipment, Image | What it is |
| Client, Address | Whose it is and where it sits |
| Brand, Model No., Serial No. | Which exact unit this is |
| Warranty Expiry Date | Whether it is still covered |
| Status | Whether it is available, ready to deploy or deployed |
| Extra Field 1, Extra Field 2 | Whatever else you record against a unit |
| Action | Row actions |
Sorting by Warranty Expiry Date is the quickest way to see what is about to fall out of cover; filtering by Status is the quickest way to see what is sitting idle.