Creating a request
Add Request, top-left of the request list, opens the form. The same button sits in both Simple View and Table View, and the scheduler has its own — Add, then Add Request — which opens the identical form.
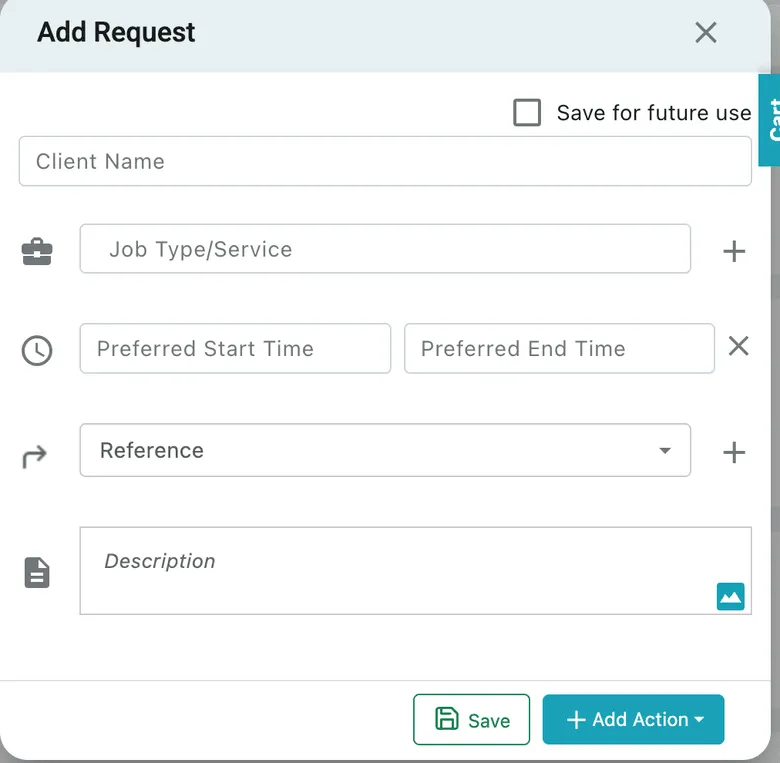
Request → Add Request
The fields you see are the fields your form defines. The example above is a five-field intake form; yours may ask for more, or ask for something entirely different. See request forms.
Fields marked with a red asterisk must be filled before the request will save.
Choosing the form
Section titled “Choosing the form”Every form you have enabled appears as its own tab across the top of the Add Request popup — an enquiry form and a ticket form sit side by side, and you pick by clicking the tab before you start typing. Each tab shows its own set of fields.
Only the forms you keep enabled show up here, so an intake screen stays down to the forms your office actually uses. See request forms.
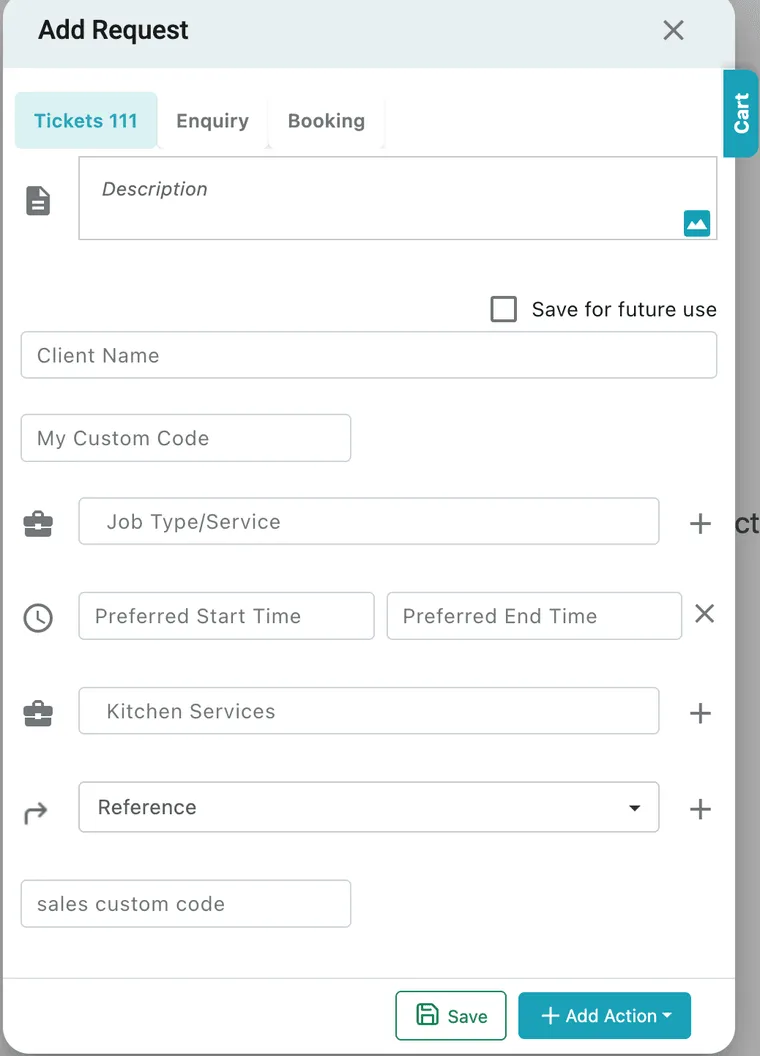
Request → Add Request, with three forms enabled
The form sets the order and the labels as well as the fields. Above, Description comes first, a My Custom Code field sits under the client, services are asked for twice — once as Job Type/Service and again as Kitchen Services — and a sales custom code field closes the form. Fields you have added yourself sit in the flow of the form alongside the standard ones, and land under Custom Fields on the finished request.
The sections below describe the standard fields under their standard names. On your own forms they may be labelled to suit how your office talks about the work.
Who the request is for
Section titled “Who the request is for”Client Name does the work for you. Type the first three letters of an existing client’s name and pick them from the list — their email, mobile number, address, city and zip code fill themselves in.
For someone who is not a client yet, simply type their details in. Save for future use, top-right, keeps them as a client for next time rather than leaving their details attached to this one request — worth ticking for anyone you expect to deal with again.
What they are asking for
Section titled “What they are asking for”Job Type/Service is what they want done. It holds more than one service — each one you pick is added as its own entry — and the + beside the field adds a service that is not in your list yet.
The services picked here are what the request’s cart prices, and what carries through to the quote or job you raise from it.
When they want it
Section titled “When they want it”Preferred Start Time and Preferred End Time are the window the client asked for — not a booked slot and not an assignment. Nobody is scheduled by filling these in; they are what you honour when you come to book the work.
The ✕ beside them clears the pair, for a request with no particular time attached to it.
Where they came from
Section titled “Where they came from”Reference is how this client found you — advertisement, existing customer, referral. Pick from the dropdown, or use the + beside it to add a source that is not in the list yet. It shows on the finished request as Reference By, and it is what lets you see later which of your channels is actually bringing work in.
What it is about
Section titled “What it is about”Description is the request in the client’s own terms — “customer reported that the ducted HVAC system is not cooling properly”. The image button in the corner of the box attaches a picture, which is how a photo of the faulty unit or the error code on a display gets onto the request from the start.
Saving it, or acting on it straight away
Section titled “Saving it, or acting on it straight away”The footer offers two ways out:
- Save records the request and puts it at the top of the list.
- Add Action saves it and opens what comes next — Create an Appointment, Create a Job, Create a Quote, Create an Audit or Add Contract — so a call that ends in “yes, book me in” becomes both a request and an appointment in one pass.
Everything on the Add Action menu can also be done later, from the + on the request’s timeline. See acting on a request.