Expenses and leave in the app
Most of the app is about the work. Two screens are about the person doing it.
Expenses
Section titled “Expenses”Expenses on the menu is everything they have claimed and where each claim has got to.
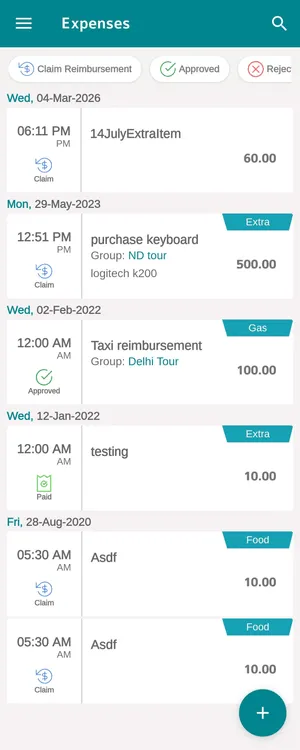
The app → Expenses
Claims are grouped under the date they were spent. Each row carries what it was for, its category — Food, Gas, Extra — the group it belongs to where there is one, the amount, and its state: Claim while it is waiting, Approved once it has been agreed, Paid once the money has gone back. The chips at the top filter to those states.
The + raises a new claim from wherever they are standing. That is the point of doing it here rather than at the end of the month: the receipt is in their hand, so the photograph gets taken. A claim with a picture of the receipt on it can be approved without anybody having to remember the day.
Everything raised here lands in Expenses in the office, where it is approved and paid. See how expenses work and approving and paying an expense.
User leaves
Section titled “User leaves”User leaves is where a fieldworker asks for time off and sees what has been agreed.
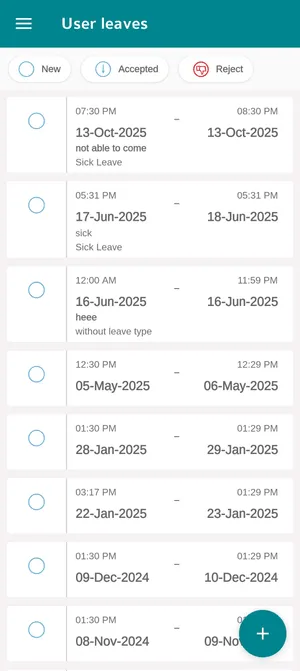
The app → User leaves
Each row is one absence — the date and time it starts and ends, the reason written with it, and the leave type, such as Sick Leave. Leave can be an afternoon or a fortnight, which is why both ends carry a time. A request booked without a type says so on the row.
The chips filter by where the request has got to: New while it is waiting on a decision, Accepted once it has been agreed, Reject if it has not. The + books a new one.
Booked leave is not only a record. It reaches the scheduler as an absence, so the person is not scheduled into a day they were never going to work — see booking leave. Leave types are set up in the office, and using the handful your company actually has is what makes leave reportable afterwards.