Adding equipment
Add Equipment sits above the list on both My Equipment and Client’s Equipment, and opens the same form. Which list you started from decides who owns the unit: your own equipment asks for a tariff rate, a client’s asks for the client and the site.
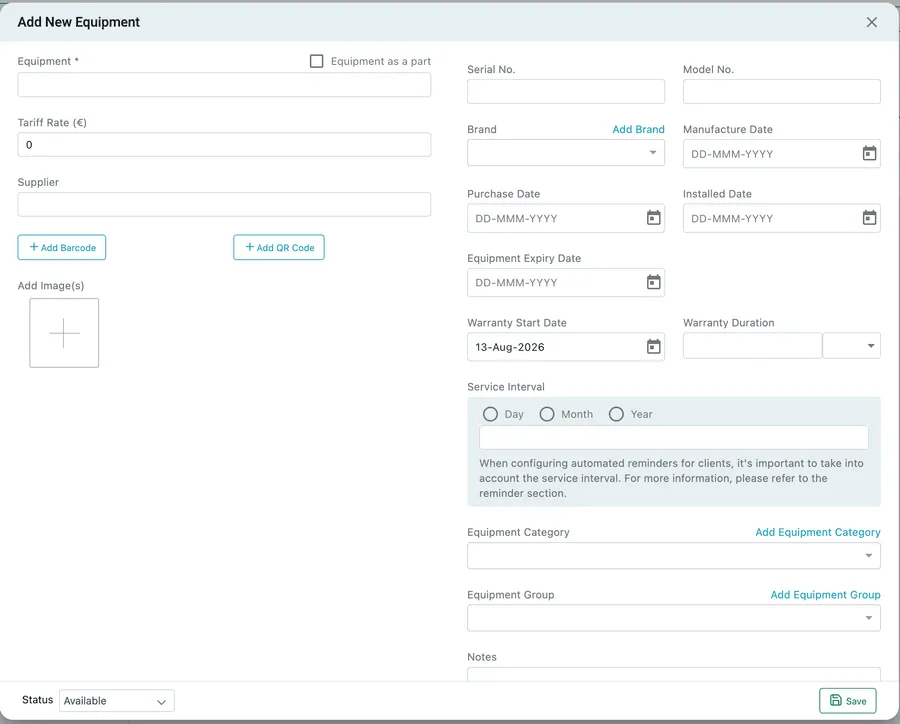
Equipment → My Equipment → Add Equipment
Only Equipment — the name — is required. Everything else can be filled in now or added later through Edit Equipment.
Naming and pricing it
Section titled “Naming and pricing it”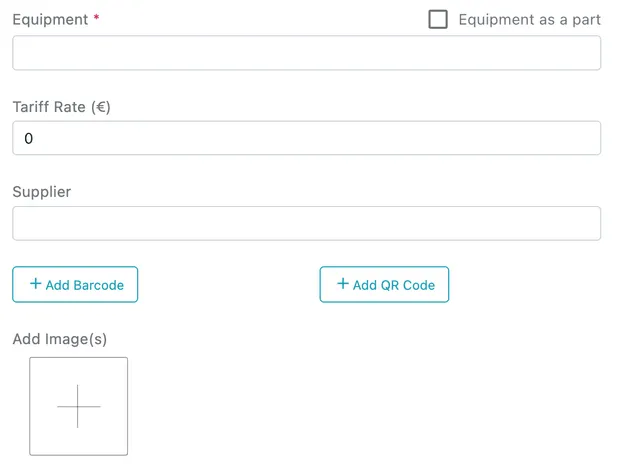
Add New Equipment, left-hand side
- Equipment is what it will be called everywhere else — on jobs, on contracts, on the fieldworker’s phone.
- Equipment as a part marks this as a component of something bigger rather than a machine in its own right. Tick it for a lens module or a housing; leave it clear for the camera. See parts on a piece of equipment.
- Tariff Rate (€) is what you charge for the unit’s use. It appears on your own equipment, and is the figure the leasing calculation works from — see equipment on contracts.
- Supplier records who you bought it from.
- Add Barcode and Add QR Code attach a scannable code, so the unit can be identified on site by scanning it rather than by reading a serial number off a label.
- Add Image(s) takes photographs of the unit — useful for anything that will be recognised by sight rather than by model number.
Identifying the individual unit
Section titled “Identifying the individual unit”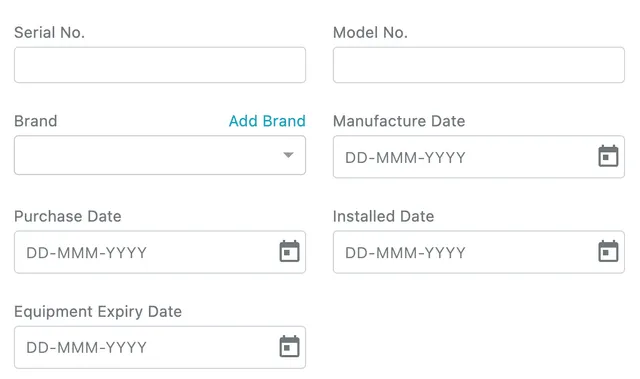
Add New Equipment, identity and dates
Serial No. is the field that separates this unit from an identical one beside it, and it is worth filling in even when nothing else is. Model No. and Brand say what it is; Add Brand creates a brand without leaving the form.
The dates each answer a different question:
| Date | What it records |
|---|---|
| Manufacture Date | When it was built |
| Purchase Date | When you bought it |
| Installed Date | When it went into service |
| Equipment Expiry Date | When it reaches the end of its usable life |
Warranty
Section titled “Warranty”
Add New Equipment, warranty
Warranty Start Date and Warranty Duration — a number and a unit, such as 6 months — set the clock running. EyeOnTask works out the expiry date from the two, shows it under the duration, and that date is what drives the Under Warranty flag when the unit turns up on a job, and the Warranty Expiry Date column in the equipment table.
Service interval
Section titled “Service interval”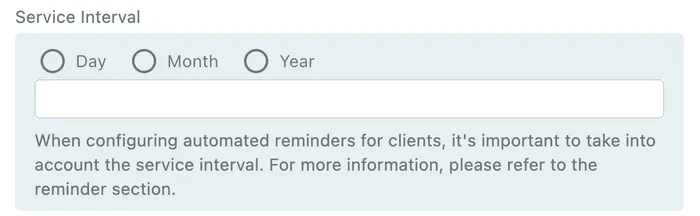
Add New Equipment, service interval
Service Interval is how often the unit is due to be looked at — every 3 months, every year. Set the unit first, then the number.
The interval is what automated client reminders are built on, so a unit with no interval will not be chased. Reminders themselves are configured in reminders.
Category and group
Section titled “Category and group”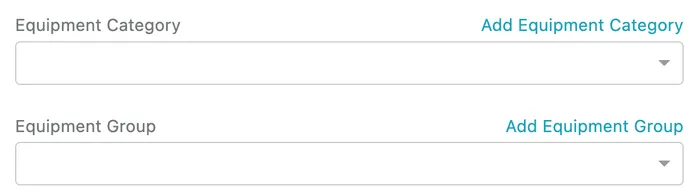
Add New Equipment, category and group
Equipment Category classifies the unit by what it is — camera, switch, generator. Equipment Group collects units that belong together for your own purposes. Both are filters on the equipment table and both can be created here or in equipment settings.
Notes underneath holds anything else worth knowing about the unit.
Status, and saving
Section titled “Status, and saving”
Add New Equipment, status and save
Status starts the unit off in the right state — Available for something sitting in your stores, Ready To Deploy for something staged for a site. The list of statuses is yours to define in equipment settings.
Save creates the unit and opens its page.
Adding a client’s unit
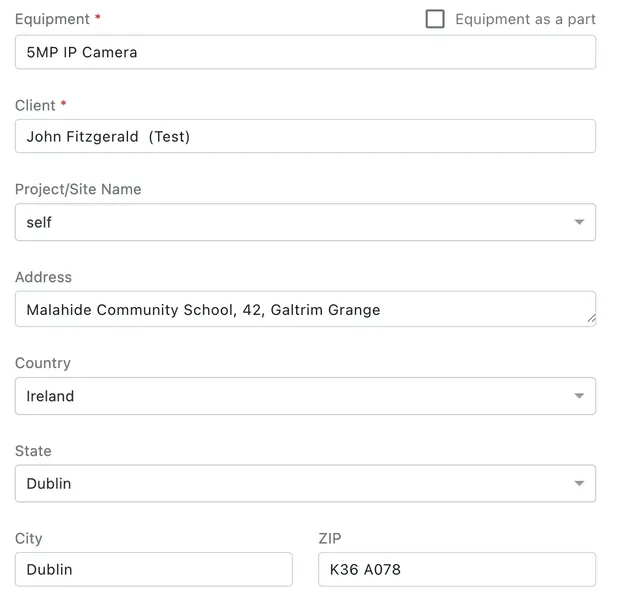
Section titled “Adding a client’s unit”Started from Client’s Equipment, the form also asks who it belongs to and where it is:
Client’s Equipment → Edit Equipment
A fieldworker can do this too, without waiting for the office: a client’s unit can be added from the app, on the job’s Equipment screen.
Client and Project/Site Name put the unit on the right record, and the address fields fix where it physically sits — which is what the fieldworker navigates to and what shows as the unit’s Current Location.