Creating an invoice
Add Invoice on the invoices list raises a bill that does not belong to one particular job. If the work you are billing is a job, invoice it from the job instead and most of this is filled in for you.
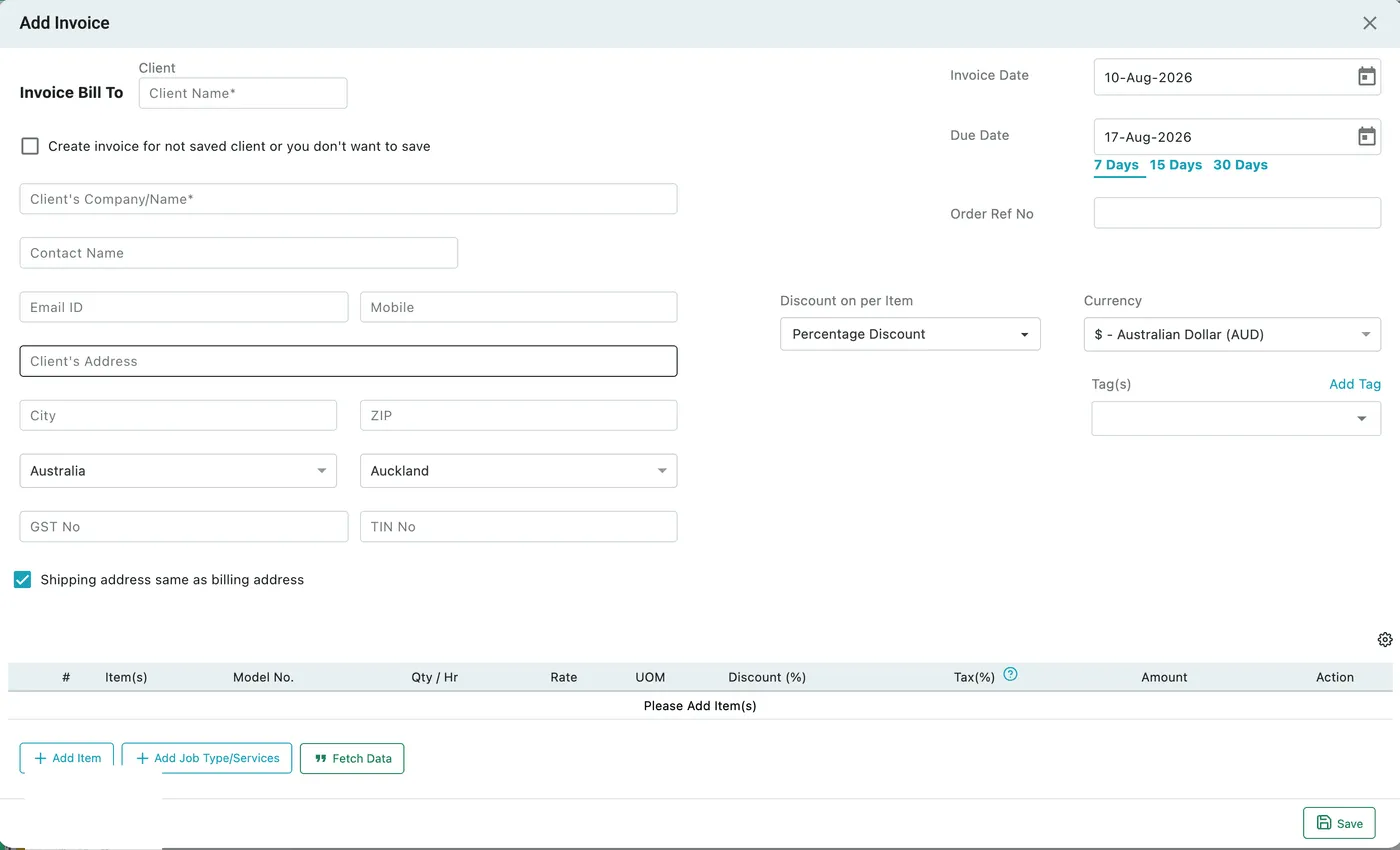
Invoices → Add Invoice
Who is being billed
Section titled “Who is being billed”Client is the field that does the work — pick one and the rest of the block fills from their record: company name, contact name, email, mobile, address, city, ZIP, country and state, plus their GST No and TIN No where you hold them. Anything can be overwritten for this one invoice.
Billing someone who isn’t a client
Section titled “Billing someone who isn’t a client”Create invoice for not saved client or you don’t want to save lets you bill someone without adding them to your client list. Tick it and you type the details straight onto the invoice.
That is the answer to the one-off sale — a walk-in, a cash job, a customer you will not see again — where creating a full client record would just clutter the list.
Ship To
Section titled “Ship To”Shipping address same as billing address is ticked by default. Where goods go somewhere other than the billing address — a site office, a different branch — untick it and give the delivery address separately. The finished invoice then shows Bill To and Ship To as two blocks.
Dates, money and terms
Section titled “Dates, money and terms”Invoice Date is when the bill is raised. Due Date is when payment is expected — unlike a quote’s due date, this one really is a deadline.
The 7 Days / 15 Days / 30 Days shortcuts set the due date relative to the invoice date, and 0 Days makes it due the same day, for work that is paid on completion.
- Order Ref No — the client’s purchase order, so their accounts team can match the bill to their own paperwork. It shows on the invoice as Order Reference Number.
- Discount on per Item — whether the discount column on each line is read as a percentage or a flat amount. Set it before you start pricing.
- Currency — the currency this client is billed in.
- Tag(s) — your own labels, added with Add Tag, for grouping and filtering invoices later.
Pulling in the detail
Section titled “Pulling in the detail”You rarely have to type an invoice from nothing. Three buttons sit under the item grid:
- Add Item — parts and products.
- Add Job Type/Services — the work performed.
- Fetch Data — pull the line items straight out of an existing Request or Quotation.
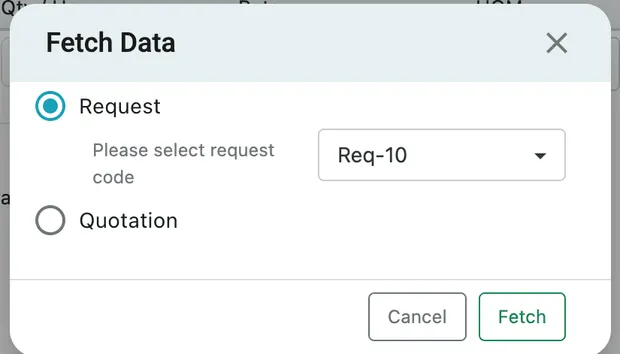
Add Invoice → Fetch Data
Fetch Data asks which you are pulling from — Request or Quotation — then which one, by code. Press Fetch and its line items land on the invoice.
So an approved quotation becomes a bill without anyone re-keying it, and a request that turned into work can be billed from what was agreed at the time. The lines themselves are covered in invoice line items.
Notes, discounts and extra fields
Section titled “Notes, discounts and extra fields”Beneath the lines:
- Invoice Notes — anything that belongs on the bill but not on a single line: payment instructions, a reference, a thank you.
- Additional Discount — a reduction on the invoice as a whole, on top of any per-line discounts, applied either before tax or after tax.
- Add Extra fields — room for anything this client needs recorded that the standard fields do not cover.
The total recalculates as you go. Save creates the invoice, ready to send or to take payment against.