Equipment actions
The top right of a unit’s page carries everything you can do to it: the ≡ menu, Edit Equipment, and the bin.
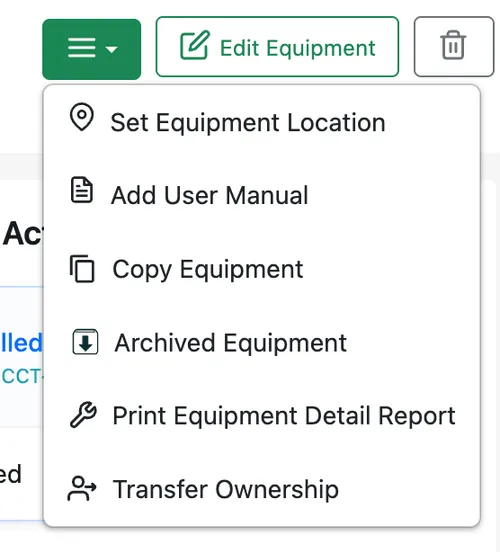
Equipment → the selected unit → ≡
Set Equipment Location
Section titled “Set Equipment Location”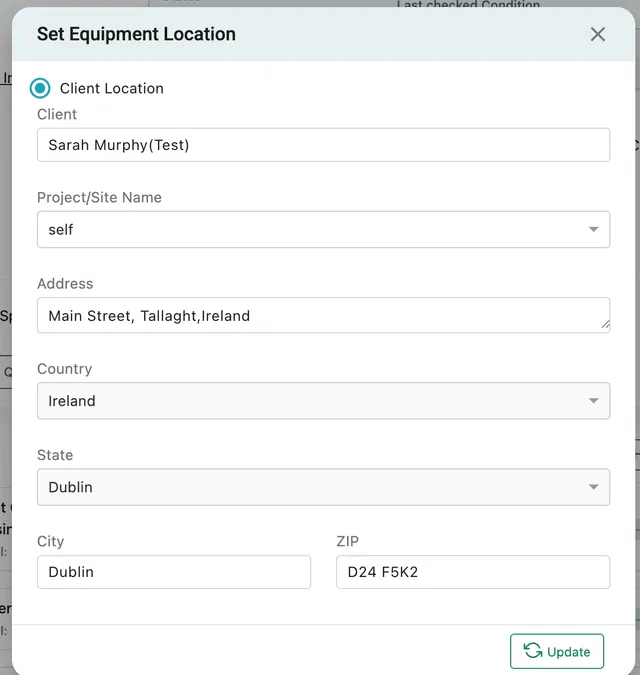
Equipment → the selected unit → ≡ → Set Equipment Location
This is how a unit’s Current Location gets set. Client Location points the unit at a client and one of their sites, and fills the address from it; the address can then be adjusted for a unit that sits somewhere specific on a large site.
The same dialog opens from the pencil on the status card, and moving a unit here is what keeps the “where is it?” question answerable without ringing a fieldworker.
Add User Manual
Section titled “Add User Manual”Attaches the documentation to the unit, so it travels with the asset instead of living in a drawer at the office. It also appears under Technical Specifications on the equipment page.
Copy Equipment
Section titled “Copy Equipment”Creates a new unit from this one’s details. Ten identical cameras from the same delivery differ only by serial number, so copying and changing that one field is faster than filling the form ten times.
Archived Equipment
Section titled “Archived Equipment”Keeps units that are out of service — decommissioned, written off, returned — without losing what they did while they were live.
Archiving takes a unit out of circulation for new work. It stops appearing in the equipment list, it is no longer offered when equipment is picked for a job or a contract, and it is gone from the fieldworker app, so nobody in the field can log service against a machine that is no longer in service.
What it does not do is rewrite the past. A job that already carries the unit still carries it, and its service history, audits and documents are all still there. Archiving is about what can be booked from today, not about what happened.
To see archived units, open Table View, click Show Filtering Options and tick Archived Equipment — see searching and filtering.
Print Equipment Detail Report
Section titled “Print Equipment Detail Report”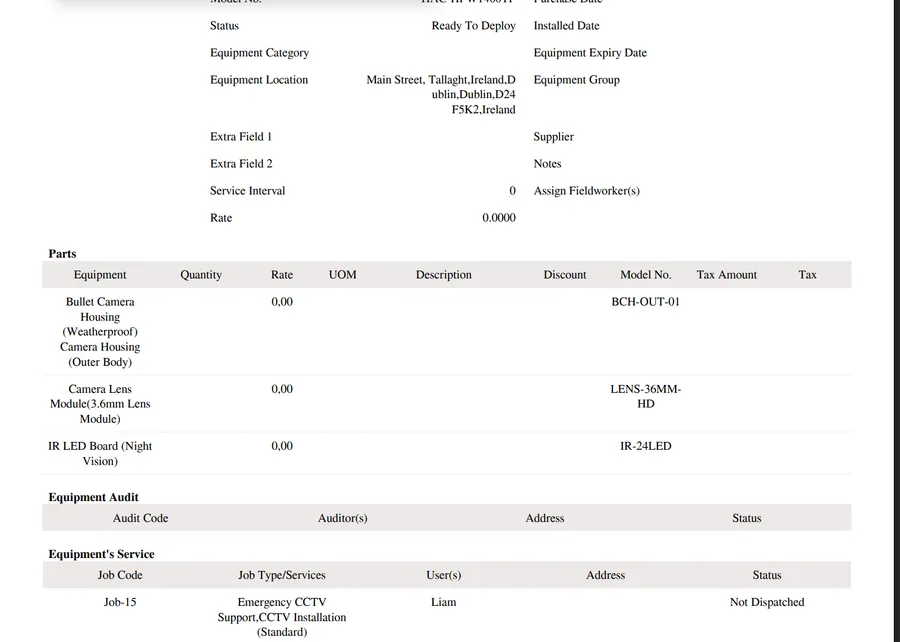
Equipment → the selected unit → ≡ → Print Equipment Detail Report
One page covering everything on record for the unit — model and status, location, category and group, supplier and notes, service interval and rate, then the Parts fitted to it, any Equipment Audit entries, and the Equipment’s Service history with job codes, the work done, the fieldworker and the status.
It is the document to hand over when a client asks what has been done to their asset, or to take to site as a briefing sheet.
Transfer Ownership
Section titled “Transfer Ownership”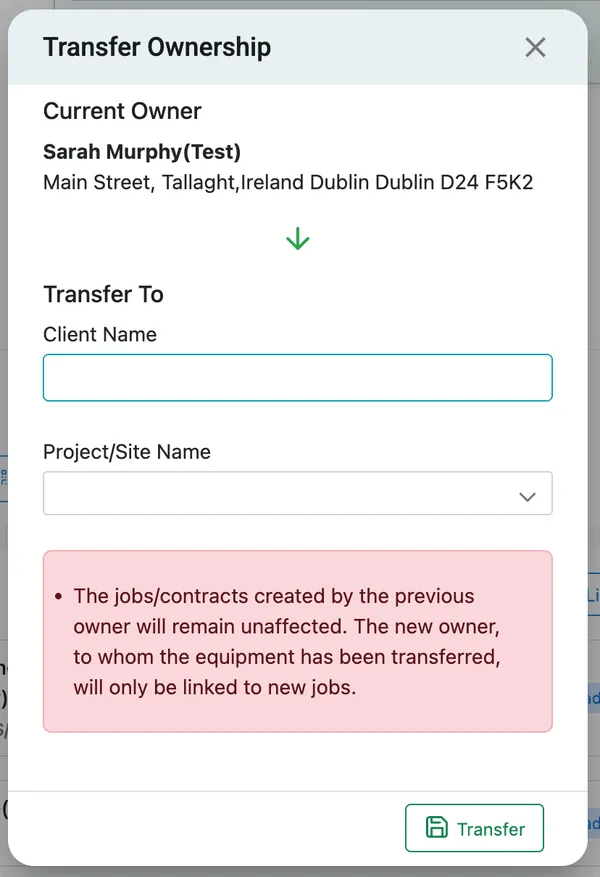
Equipment → the selected unit → ≡ → Transfer Ownership
Moves the unit onto a different client’s record — a site changing hands, a landlord replacing a tenant, kit sold on.
Pick the Client Name and the Project/Site Name and press Transfer. Work already recorded stays where it is: jobs and contracts created by the previous owner are unaffected, and the new owner is linked only to jobs raised from now on. The unit’s history stays with the unit.
Edit Equipment
Section titled “Edit Equipment”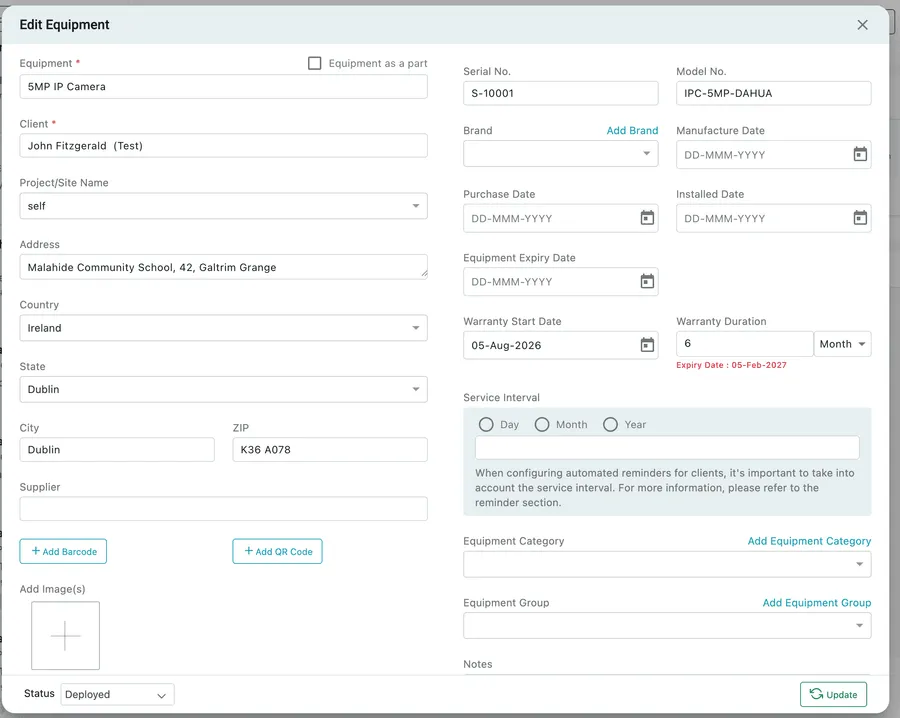
Equipment → the selected unit → Edit Equipment
Reopens the same form used to create the unit, with everything editable — see adding equipment for what each field does.

Edit Equipment → warranty
Changing the Warranty Start Date or Warranty Duration recalculates the expiry date immediately, shown under the duration — worth checking after a part is replaced under a fresh guarantee.
Update saves.
Deleting
Section titled “Deleting”The bin removes the unit. Its service history goes with it, so a unit that is simply no longer in service is better archived than deleted.
Deleting does not disturb a contract the unit was linked to. What a contract holds is its jobs and its invoices, and both stay exactly as they were — see what happens to the contract.