Adding an expense
Add Expense opens the claim form. It is on the Expenses screen and on a job’s own Expenses tab — the same form either way, with the job already filled in when you start from the job.
Most claims are not typed here at all. The person who spent the money raises them from the app as they spend, with the receipt photographed while it is still in their hand — see expenses and leave in the app. This form is for the ones that reach the office another way.
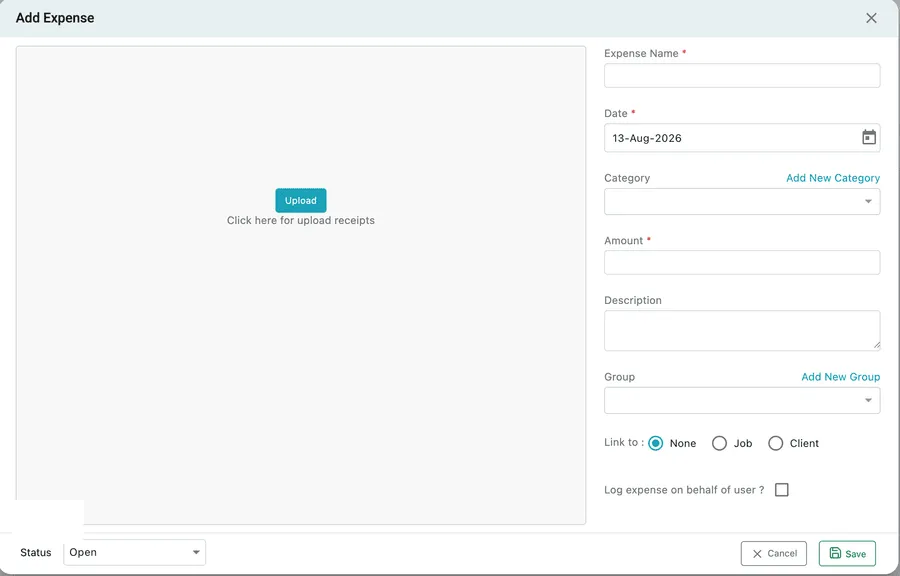
Expenses → Add Expense
The receipt
Section titled “The receipt”The left of the form is for the receipt.

Add Expense → Upload
Upload attaches a photograph or scan of the receipt to the claim. It stays with the expense from then on, and is what anyone approving or paying the claim looks at.
The details
Section titled “The details”| Field | What goes in it |
|---|---|
| Expense Name | What the money went on — Food, travelling, extra camera. Required |
| Date | The day it was spent, not the day it is being claimed. Today’s date is filled in for you. Required |
| Category | The kind of spend — fuel, food, travel, materials. Add New Category creates one without leaving the form |
| Amount | What it cost. Required |
| Description | Anything the name does not say — the route driven, why the part had to be bought |
| Group | Collects related claims together, with Add New Group alongside |
Categories and groups can also be set up in advance — see expense categories and groups.
What the claim belongs to
Section titled “What the claim belongs to”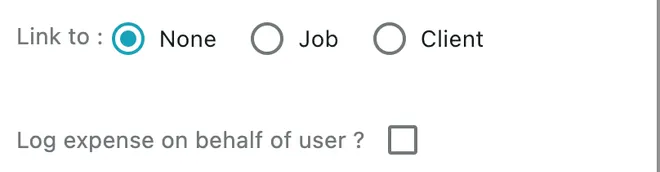
Add Expense → Link to
Link to points the claim at the work it came out of:
- None — a general company cost that belongs to no particular job.
- Job — a Job Id field appears for the job the money was spent on. Starting from a job’s Expenses tab, this is already set.
- Client — a Client Id field appears, for a cost that belongs to a client rather than to one visit.
What linking changes is covered in expenses on jobs and clients.
Log expense on behalf of user records the claim in somebody else’s name. Fieldworkers normally submit their own from the app; tick this when you are entering one for a worker who could not, so the claim still belongs to them and is paid back to them.
Status and saving
Section titled “Status and saving”
Add Expense → footer
Status starts at Open, which is where a claim waiting on a decision belongs. Save records it.
The claim now appears in the expense list, on the job it was linked to, and in the estimated profit for that job.