Finding and filtering expenses
Table View turns the claims into one row each with every field as a column. It is the view for questions about a lot of claims at once — what is still unpaid, what one fieldworker has claimed this month, what a job really cost in fuel.
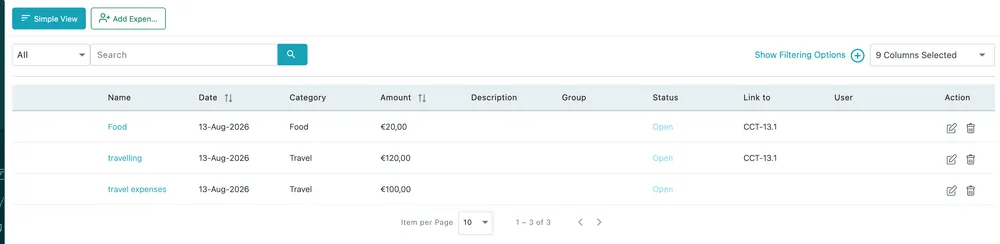
Expenses → Table View
The columns
Section titled “The columns”| Column | What it shows |
|---|---|
| Name | The claim, and a link into it |
| Date | The day the money was spent |
| Category | The kind of spend |
| Amount | What it cost |
| Description | Whatever detail was added |
| Group | The group it was filed under |
| Status | Open, Approved, Reject or Paid |
| Link to | The job or client it belongs to |
| User | Whose claim it is |
| Action | Edit and delete, without opening the claim |
The arrows next to Date and Amount sort by them — largest claims first, or oldest first.
User and Status together are the pair to read when you are paying people: filter to one worker, sort by date, and you have what the company owes them.
Searching and filtering
Section titled “Searching and filtering”
Expenses → Table View
- The search box finds a claim by what was typed on it, and the dropdown beside it narrows what is being searched.
- Show Filtering Options opens the full set of filters above the table.
- Columns Selected decides which columns the table shows — untick what you do not use and the rest get the width.
Item per Page and the arrows underneath the table page through longer lists.
Getting back to one claim
Section titled “Getting back to one claim”Clicking a claim’s name opens it. Simple View returns you to the list-and-detail layout described in how expenses work.