Equipment on a job
Equipment Management sits inside the job form and decides which physical units this visit is about. Naming them changes what comes back afterwards: instead of one note saying “serviced the ACs”, you get a separate report for every unit — its condition, what was done to it, which parts went in, and photos — all under one job.
That is what makes a detailed report possible for the client. Ten cameras at a site, five AC units in a building, a row of solar inverters: each one reported on individually, on one visit.
The section has two sides, and they answer two different questions.
The client’s equipment
Section titled “The client’s equipment”Client’s Equipment List is for work on units the client already owns — servicing, checking, repairing. The units themselves are covered in client’s equipment.
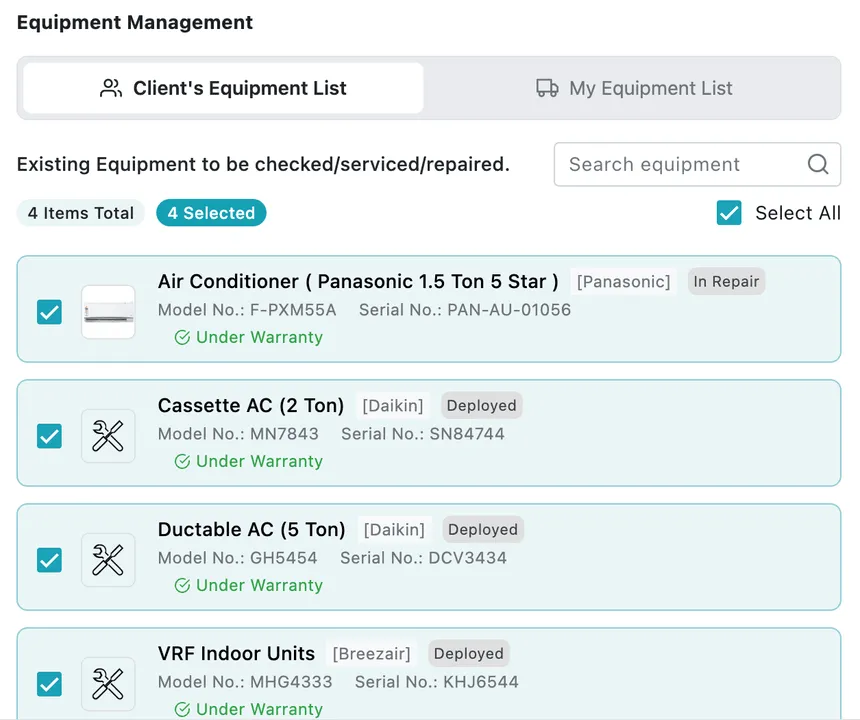
Create New → Job → Equipment Management → Client’s Equipment List
The heading says what the list is for: existing equipment to be checked, serviced or repaired. Everything on record for the chosen client and site is listed — name, brand, model number, serial number, current state (Deployed, In Repair) and whether it is still Under Warranty. Tick the units this job covers, or Select All, and the count updates as you go.
Each selected unit becomes a line the fieldworker must report on, and each comes back with its own remark and photos in completion detail.
Equipment that isn’t on record yet
Section titled “Equipment that isn’t on record yet”Plenty of jobs turn up equipment nobody has logged. Two buttons above the list add it as part of this job.
Add new equipment for installation is for a unit you are putting in. Add new equipment for repair is for a unit already on site that was never recorded. Both open the same short form.
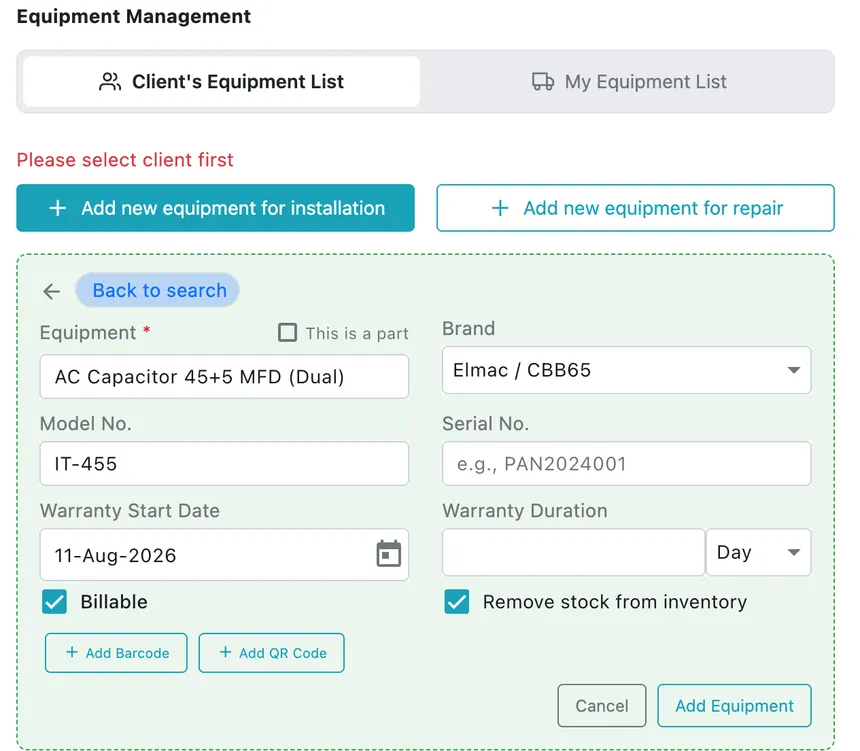
Client’s Equipment List → Add new equipment for installation
- Equipment and Brand name it; Model No. and Serial No. identify the individual unit.
- This is a part marks it as a component rather than a whole machine — a capacitor, a compressor — so it is tracked as part of something else.
- Warranty Start Date and Warranty Duration start the clock on the guarantee, which is what makes Under Warranty show later.
- Billable decides whether the client is charged for it on this job.
- Remove stock from inventory takes the unit out of your stock when the job saves, so fitting it on site and depleting the warehouse are the same action.
- Add Barcode and Add QR Code attach a scannable code, so the unit can be found later by scanning it on site.
Add Equipment puts it on the job and on the client’s record from here on.
Your own equipment
Section titled “Your own equipment”My Equipment List is the other side: equipment you own that goes out to client sites — the leasing and hire case, and any kit you install, maintain and eventually take back. See my equipment.
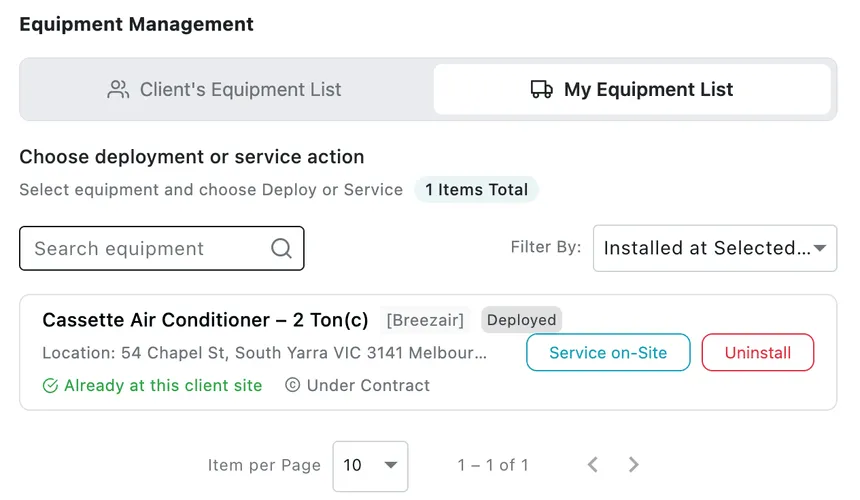
Create New → Job → Equipment Management → My Equipment List
The prompt is choose deployment or service action — you are telling the fieldworker what to do with the unit, not just that it is involved:
| Action | What the visit is for |
|---|---|
| Deploy | Take the unit out and install it at this client’s site |
| Service on-Site | It is already there; maintain or repair it where it stands |
| Uninstall | Bring it back — end of hire, end of contract, or a swap |
Each unit shows where it is (Location), its state, and two useful flags: Already at this client site — which is why it offers Service on-Site and Uninstall rather than Deploy — and Under Contract, meaning it is out on a live agreement. Filter By narrows the list to what is installed at the selected site, so you are not scrolling your whole fleet.
Every deployment and uninstall recorded this way keeps the unit’s location history straight: you always know which of your equipment is at which client.
Tools required
Section titled “Tools required”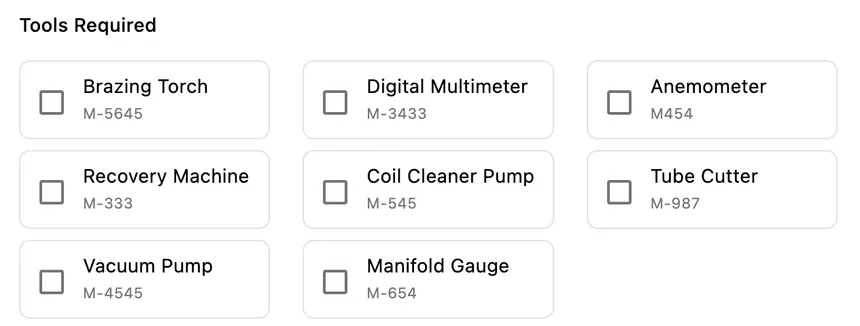
Create New → Job → Tools Required
Tools Required is the pack-before-you-go list — a brazing torch, a vacuum pump, a manifold gauge. Tick what the job needs and it travels with the job to the fieldworker’s phone, so nobody drives an hour to find they left the recovery machine behind. The tools themselves are kept in my tools.
Changing equipment later
Section titled “Changing equipment later”Equipment is not locked in at creation. Edit Job reopens the same form and the same two lists, so units can be added or removed while the job is still open — useful when the fieldworker rings in to say there is a fifth unit nobody mentioned.
On the fieldworker’s phone
Section titled “On the fieldworker’s phone”Every unit named here becomes a card on the job in the app, and each one is reported on separately.
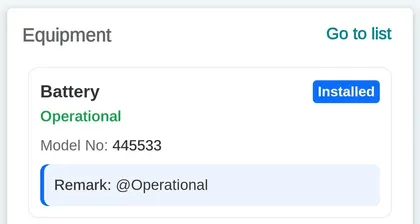
The app → a job → Equipment
Opening a card gives the fieldworker the unit’s history and what they can do to it — service it, replace it, send it for repair, relocate it or scrap it. See equipment in the app.
Once work has been reported, each unit’s condition, remark and photos appear on the Completion Detail tab, and the parts fitted to it are listed underneath.