Request forms
The request form is not fixed. An enquiry, a support ticket, a booking query and a sales lead all arrive as requests, and they do not ask for the same information — so you build the form, and you can build more than one.
Set up only the forms you need and disable the rest. The ones you leave enabled appear as tabs on the Add Request popup, so an enquiry form and a ticket form sit side by side for whoever is taking the request, and every request records which form it came in on.
Where to build them
Section titled “Where to build them”Go to Settings on the main menu, open Modules, then Request, then Request Form(s).
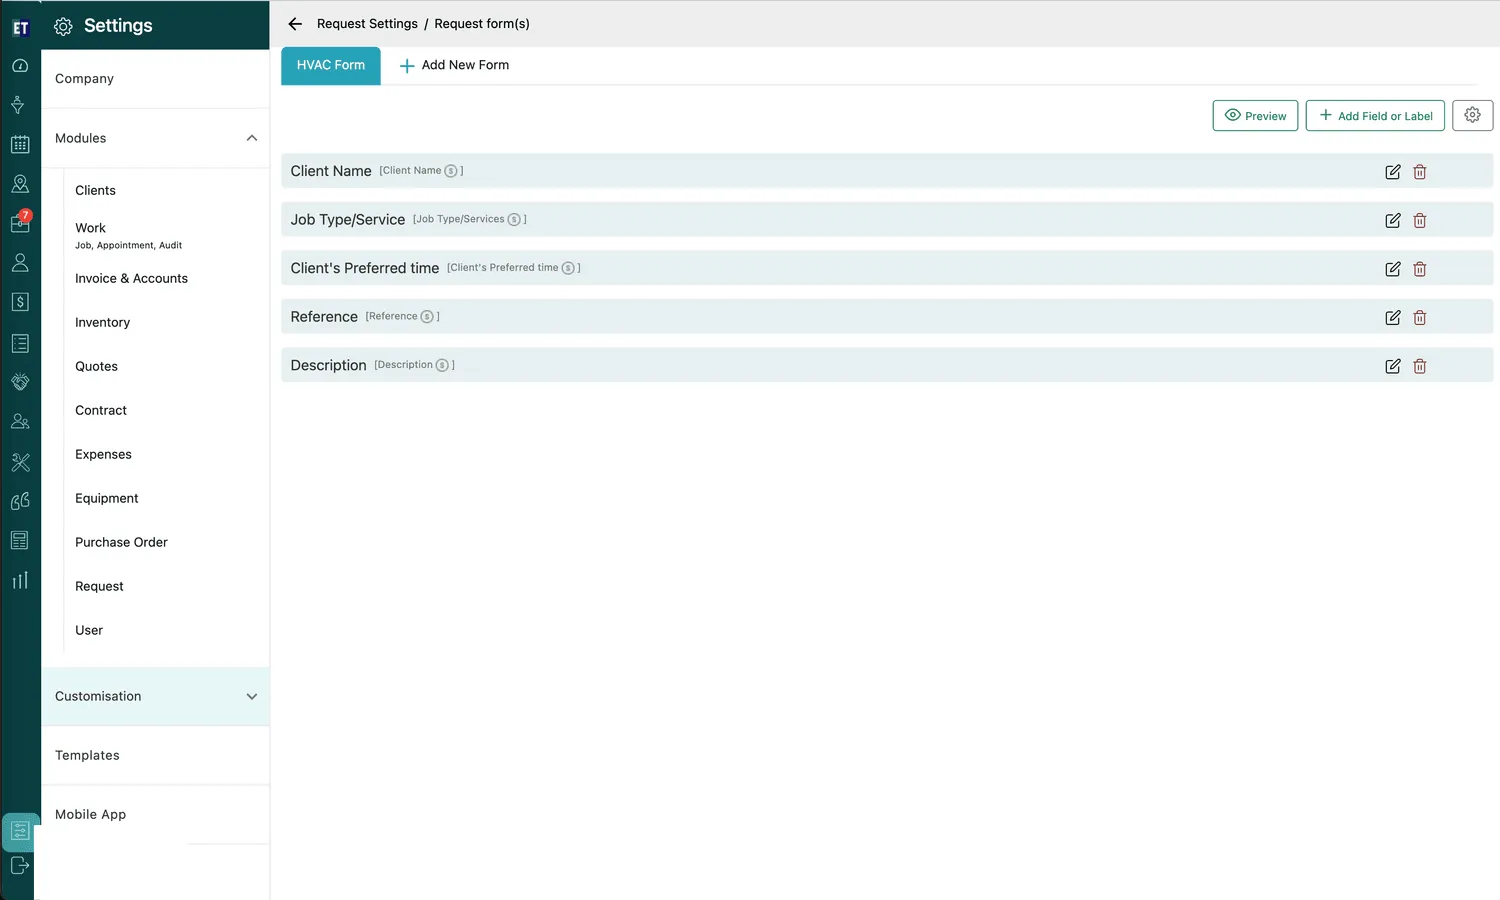
Settings → Modules → Request → Request form(s)
The form page
Section titled “The form page”
Request form(s) → tabs and buttons
- The tabs along the top are your forms. Click one to work on it.
- + Add New Form creates another.
- Preview shows the form as the person filling it in will see it.
- + Add Field or Label puts a field on the form.
- The gear holds the form’s own settings, and is where a new custom field is created.
Creating a form
Section titled “Creating a form”Add New Form asks for a title and a description for the form. Tick Set as Default to make it the form requests are raised on unless another is chosen. Save creates it, and it appears as a new tab.
A new form starts empty; the fields are next.
Enabling and disabling forms
Section titled “Enabling and disabling forms”Which forms are shown is decided here, on the same screen you design them on — Settings → Modules → Request → Request Form(s).
A form you are not using can be disabled rather than deleted. A disabled form keeps its fields and the requests already raised on it; it simply stops appearing as a tab on the Add Request popup, so the person taking a call is only offered the forms that are actually in use.
Adding fields
Section titled “Adding fields”+ Add Field or Label opens a window with two sections:
- System Defined Fields — the fields EyeOnTask already understands: client name, job type/service, the client’s preferred time, reference, description, attachments.
- Organization Custom Fields — the fields you have made yourself.
Pick what the form needs from either section and it is added to the form.
Choosing system fields where they exist is worth doing: they are the ones the rest of the app reads. Client Name is the field that autofills from a client’s record and links the request to them; Job Type/Service is what the cart prices and what carries into a quote or job.
The field list
Section titled “The field list”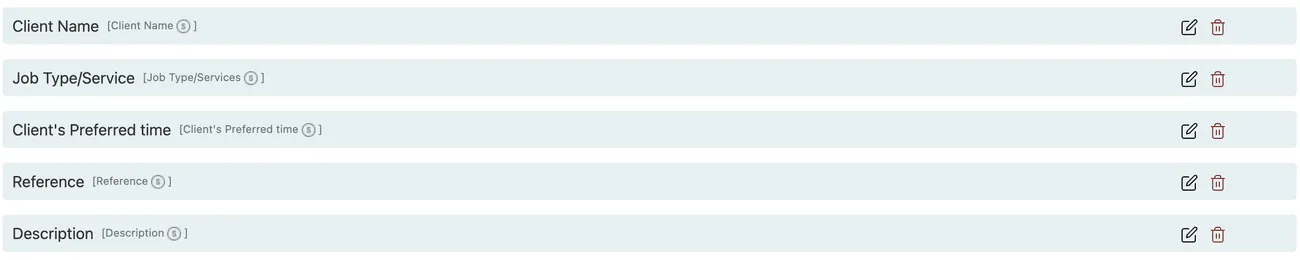
Request form(s) → fields
Each row is one field on the form. The bold text is the label the person filling it in reads; the grey text in brackets is the field it is stored in. The pencil edits the row, and the bin takes the field off the form.
Creating your own field
Section titled “Creating your own field”When nothing in the list asks what you need to ask, make a field: the gear beside Add Field or Label, then Create a new custom field.
Choose the field type that suits the answer you want, fill in the field’s details, and Save. The field then appears under Organization Custom Fields, ready to add to this form — or to any other.
Whatever you add this way shows up on the request itself under Custom Fields.
Checking it before you use it
Section titled “Checking it before you use it”Preview draws the form exactly as it will appear when someone raises a request on it:
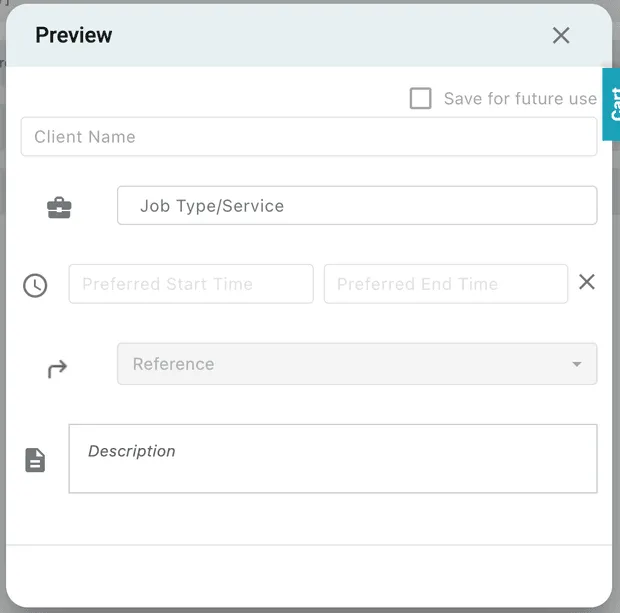
Request form(s) → Preview
This is the fastest way to see whether the form reads sensibly — the order of the fields, and whether you are asking a client on your website for something only your own staff would know.