Raising a warranty claim
Warranty Claim, above the claim list, opens the form. Edit Warranty Claim on an existing claim opens the same form filled in.
Claim Details
Section titled “Claim Details”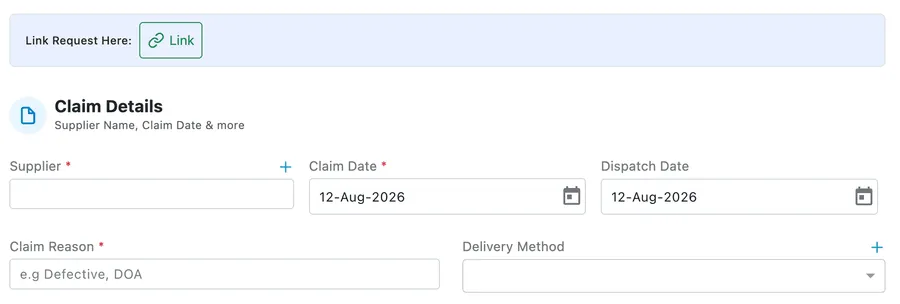
Add Warranty Claim → Claim Details
Link Request Here at the very top attaches the request the complaint came in on, so the claim and the customer’s original report stay joined up.
| Field | What it is |
|---|---|
| Supplier | Who the claim is against. Required, with a + for adding a supplier you have not used before. |
| Claim Date | When you are raising it. |
| Dispatch Date | When the faulty item goes back to the supplier. |
| Claim Reason | What is wrong — defective, dead on arrival, and so on. Required. |
| Delivery Method | How it is going back, and how the replacement returns. |
| Private Notes | Your own note. It stays internal. |
Client Details
Section titled “Client Details”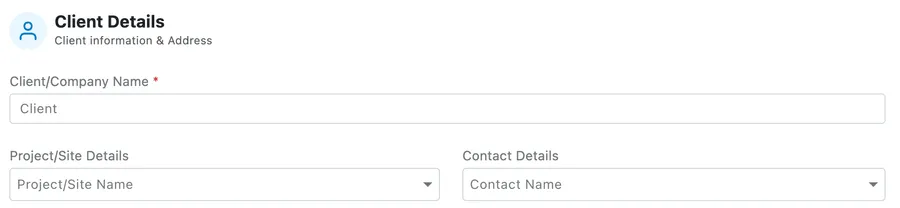
Add Warranty Claim → Client Details
Who the item was installed for: the Client/Company Name (required), the Project/Site Details it is installed at, and the Contact Details — the person on site, with their phone and email pulled in from the client record.
Deliver To
Section titled “Deliver To”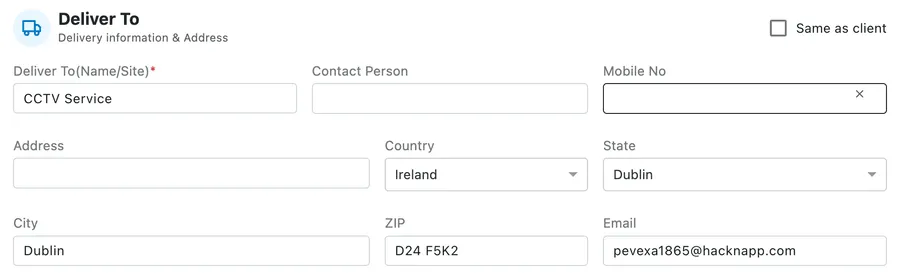
Add Warranty Claim → Deliver To
Where the replacement should be sent. Deliver To(Name/Site) is required, and Same as client fills the whole block from the client’s own address when the supplier is shipping direct to site. Left alone, it is your own premises.
Claim Item
Section titled “Claim Item”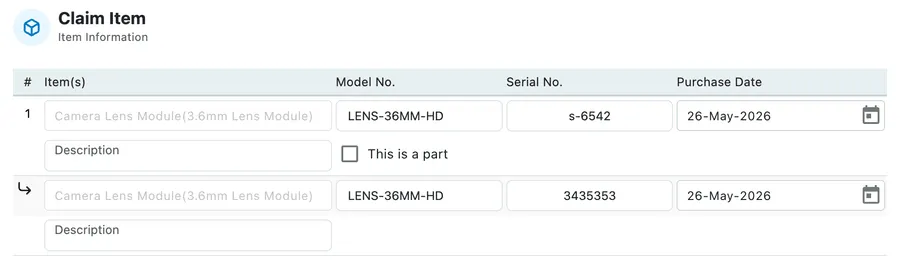
Add Warranty Claim → Claim Item
What you are actually claiming. Each line takes the Item(s), its Model No., its Serial No. and its Purchase Date — the last two being what the supplier checks the warranty against — with a Description of the fault underneath.
This is a part claims a component from inside the item rather than the whole unit, and the part appears indented beneath the line it belongs to. Use it when the camera is fine but its lens module failed.
Saving
Section titled “Saving”
Add Warranty Claim → footer
The Warranty Claim dropdown in the footer sets where the claim stands — it is how the claim moves on as the supplier accepts it and the replacement comes back. Save creates the claim, Update saves changes to an existing one.