Taking requests from your website
The same request forms your office uses can be put in front of your clients — on the client portal, and embedded in your own website. What a visitor submits arrives in the Request list as a request, on the form they filled in, ready to act on.
Setting up the form clients see
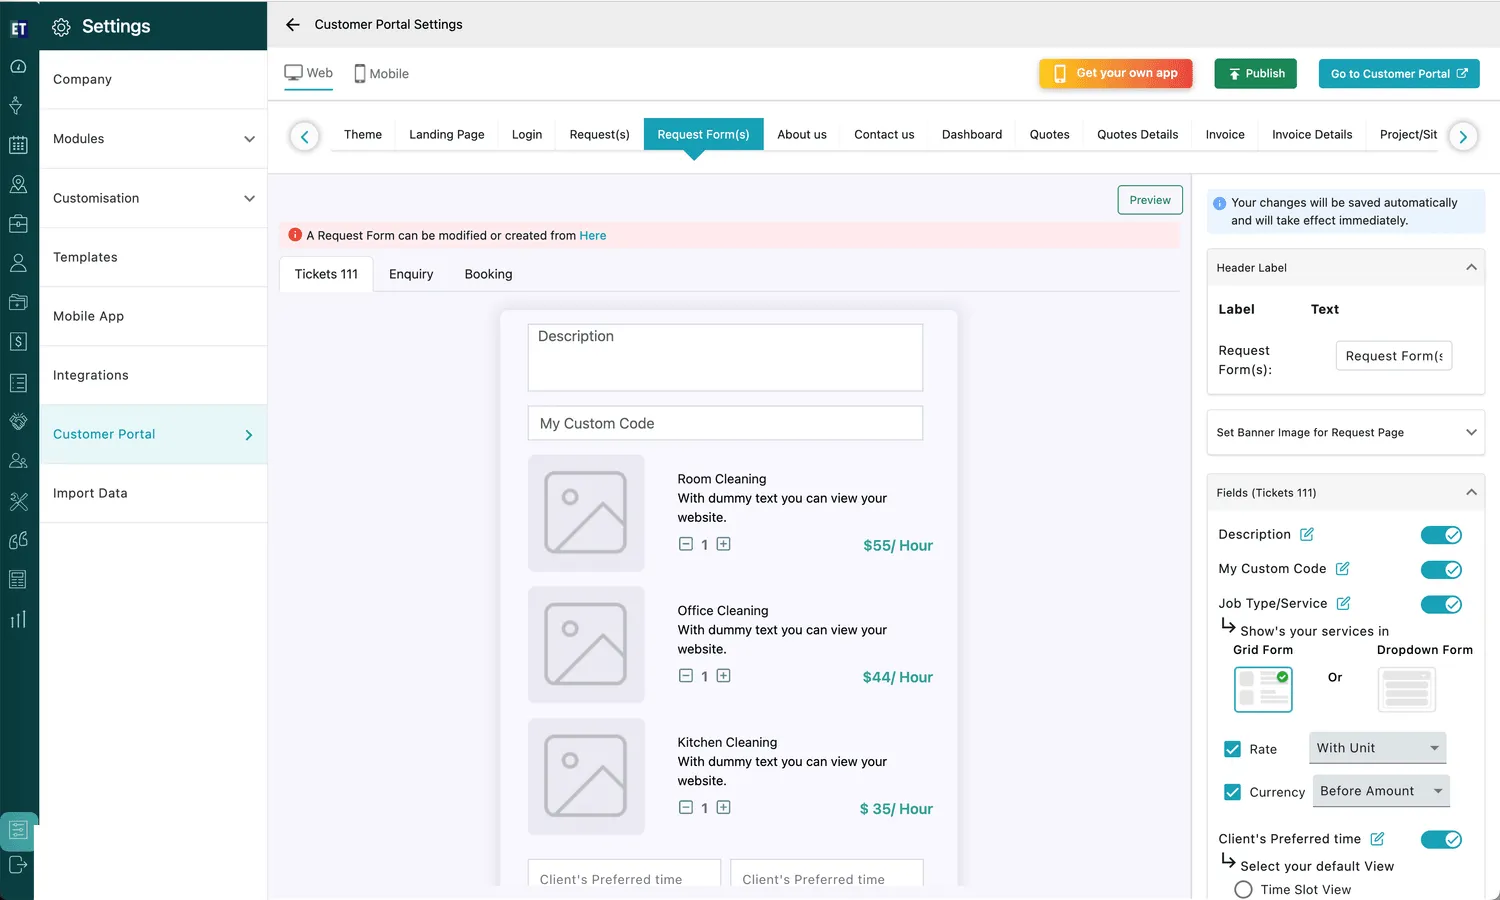
Section titled “Setting up the form clients see”Go to Settings on the main menu, then Customer Portal. The tabs across the top are the portal’s pages; Request Form(s) is the one that decides how the request form looks and what it asks for.
Settings → Customer Portal → Request Form(s)
Web and Mobile, top-left, are configured separately, so the portal can ask for less on a phone than it does on a desktop.

Customer Portal Settings → tabs
The forms themselves come from the same place as always — the notice on the page links straight to the form designer, and the tabs are the forms you have enabled: Tickets 111, Enquiry, Booking. Adding a field or a whole new form is done in request forms; this screen only decides how each one is presented to clients.
Changes here save automatically and take effect immediately, so the portal is live as you work on it.
What the client sees
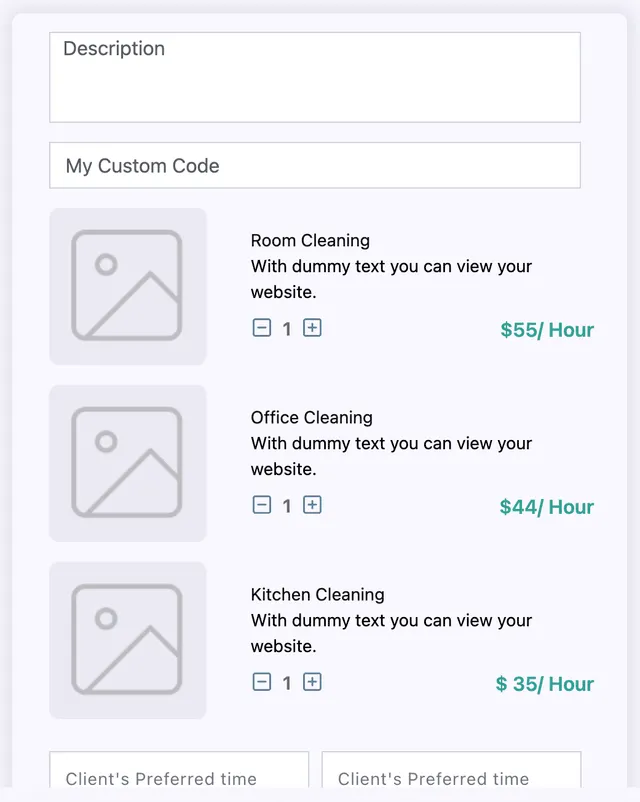
Section titled “What the client sees”The middle of the screen is a live preview of the form as the client gets it.
Customer Portal Settings → Request Form(s), preview
Services can be presented as cards with a picture, a description and a price — Room Cleaning, $55/Hour — with a quantity stepper on each, so the client picks what they want and how much of it. That is a request form doing the work of a price list.
Preview, top-right, opens the whole thing as the client would see it.
Deciding what to ask a client for
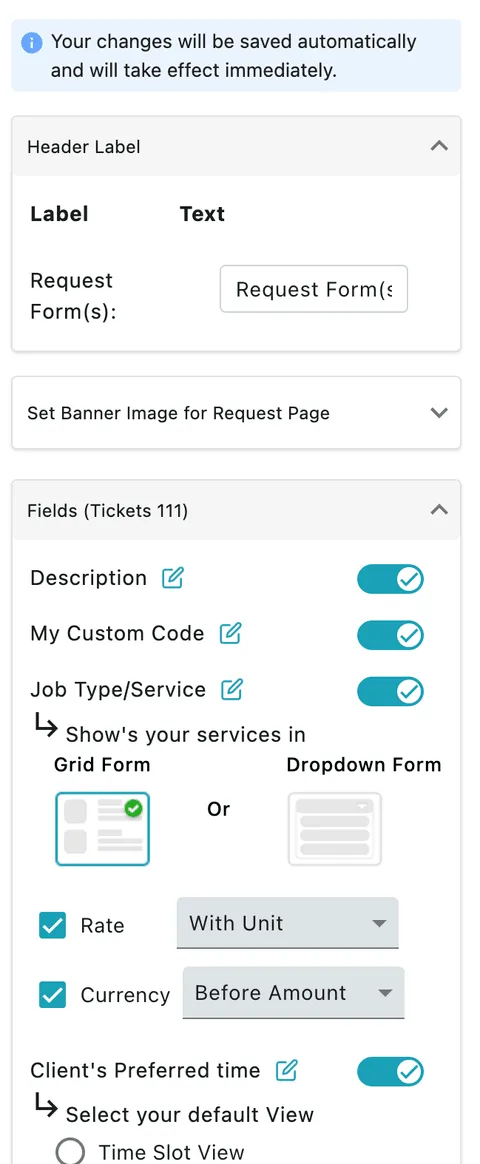
Section titled “Deciding what to ask a client for”The panel down the right controls the form field by field.
Customer Portal Settings → Request Form(s), field panel
- Header Label is the wording above the form.
- Set Banner Image for Request Page puts your own image at the top of it.
- Fields lists every field on the chosen form with a switch, so a field your staff need but a client should not see is simply turned off here. The pencil beside a field renames it for the portal.
Some fields have their own options underneath:
- Job Type/Service — show your services as a Grid Form (the cards above) or a Dropdown Form, and choose whether to show the Rate and the Currency with them. Rate can be shown With Unit — $55/Hour rather than $55 — and the currency symbol placed before or after the amount.
- Client’s Preferred time — pick the default view the client is offered, such as Time Slot View.
Putting it on your website
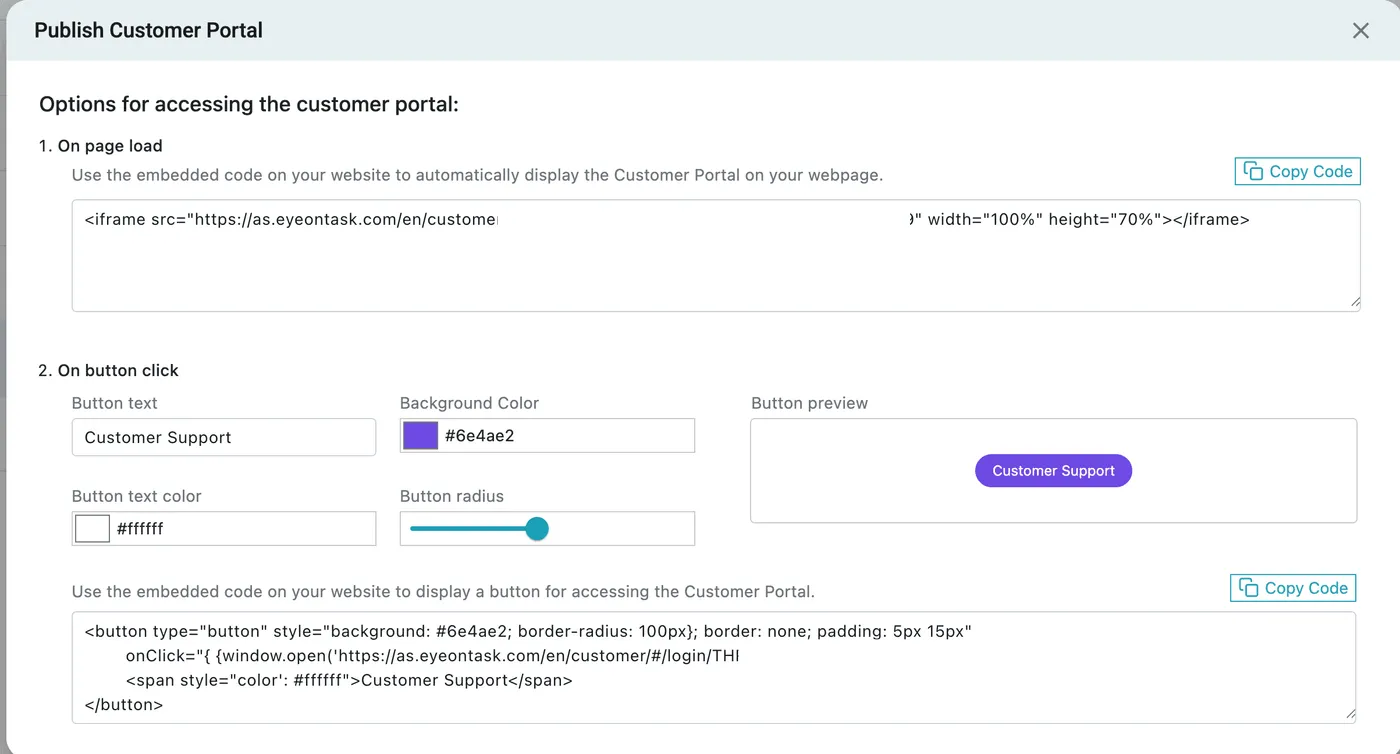
Section titled “Putting it on your website”Publish, at the top of Customer Portal Settings, gives you the code to drop into your own site.
Customer Portal Settings → Publish (the account’s own portal token is blanked out of this image)
Two options, each with a Copy Code button:
- On page load — an iframe snippet that displays the portal inside one of your own pages. Paste it where you want the form to appear, and a visitor fills it in without leaving your site.
- On button click — a button snippet that opens the portal when clicked. Set the Button text (Customer Support), Background Color, Button text color and Button radius, watch it in Button preview, then copy the code. Good for a support button in a corner of every page.
Go to Customer Portal opens the live portal so you can check the result, and Get your own app is the route to a branded mobile app rather than a web page.
What arrives at your end
Section titled “What arrives at your end”A submitted form becomes a request in the Request list like any other — with the client’s details, the services they chose, their preferred time and their description — carrying the Form Name of the form they used. From there it is triaged, quoted or scheduled the same as a request typed by your own staff.
See the life of a request and acting on a request.